Google Analytics 4 is the Google analytics service that lets users collect analytics figures simultaneously from websites and apps. Learn more about the GA4 features.
How to create and set up GA4
1. Go to Google Analytics: https://analytics.google.com/. If there are no Google Analytics trackers on your current account, you will be offered to create an account right away. To do so, click the “Start measuring” button.

If the account used to have Google Analytics trackers before, open the “Admin” tab, tap on the “Create” button and choose “Account”.

2. Create the GA4.
For the “Account name”, enter your website’s address. Then, go to the next step.
Please note. All the checkmarks are prefilled, click the “Next” button.
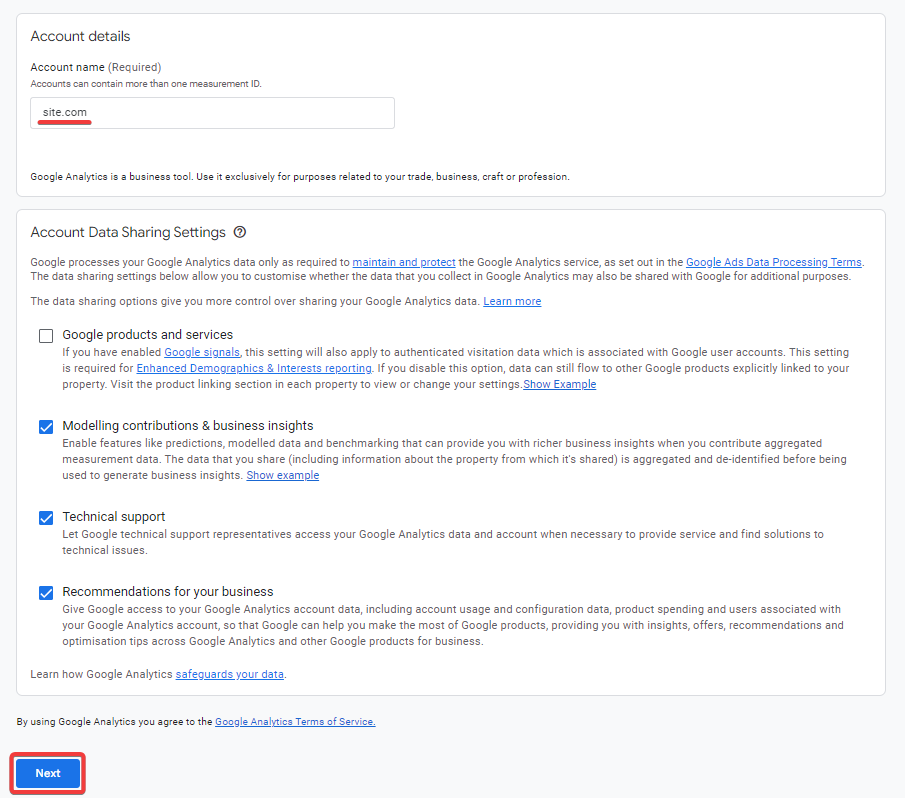
3. Create the GA4 property.
In the “Property name” field, enter your website’s domain name. In the “Reporting time zone” field, select your country and city (or any country and city in the same time zone). Then, select your country’s currency. Move to the next step.
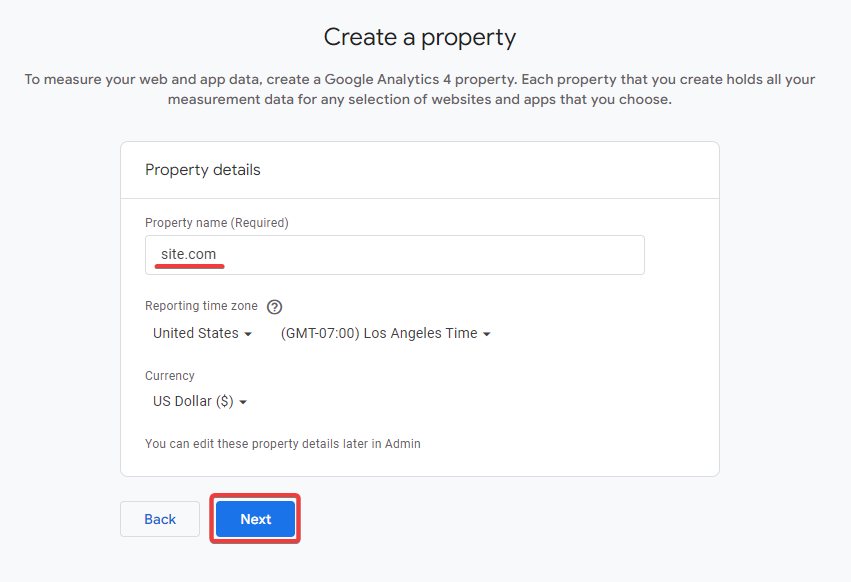
4. About your business.
In the “Industry category” list, select your business activity. Then, mark your “Business size”. Then, click the “Next” button.
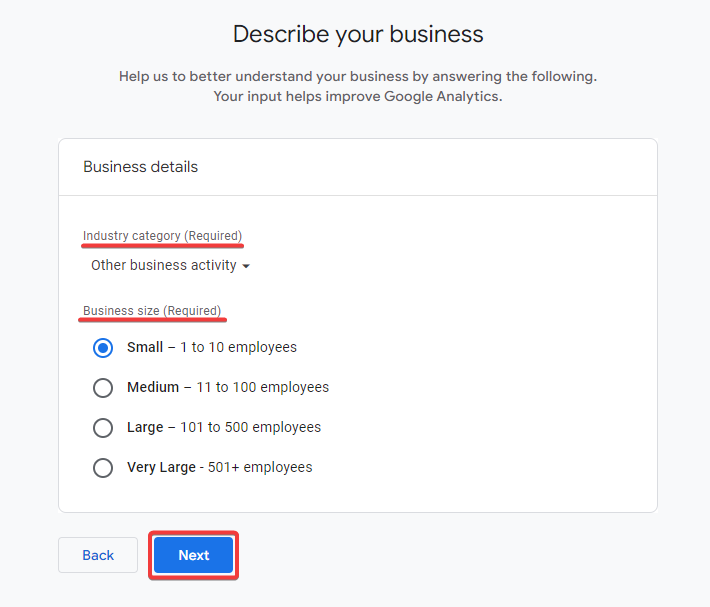
5. Choose your business objectives.
Choose the topics most important to your business. Reports will be personalized to your business objectives. Then, click the “Create” button.
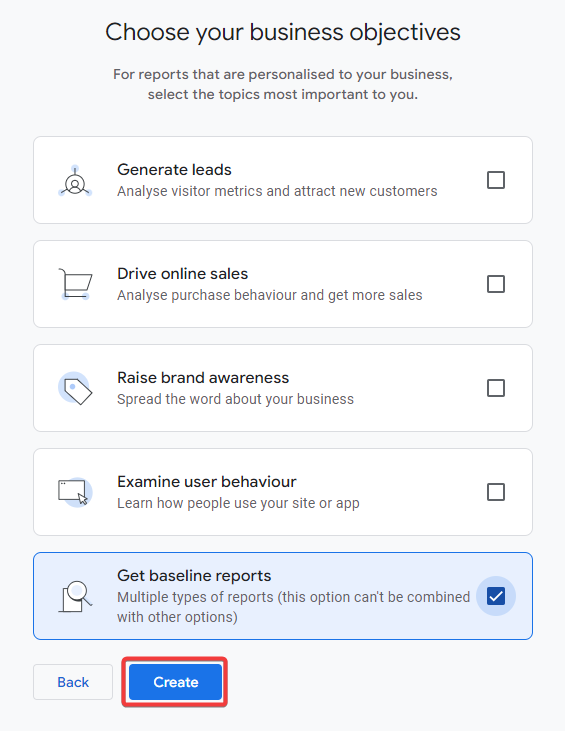
6. Google Analytics Terms of Service Agreement.
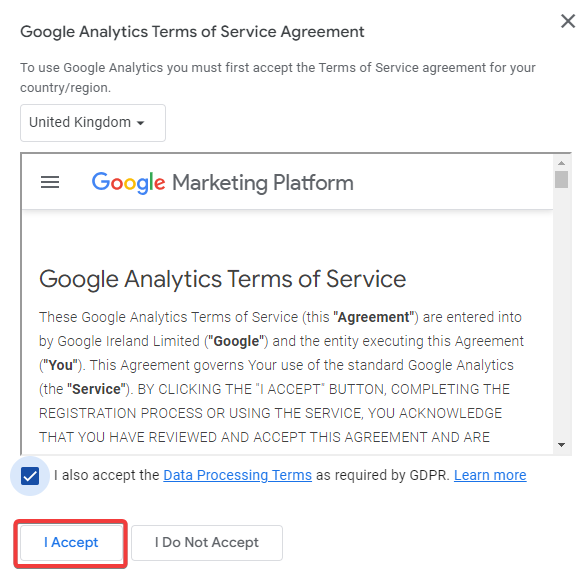
Select the country where your hotel is located in. Accept the Google Analytics terms of service agreement by clicking on the "I Accept" button.
7. Data streams.
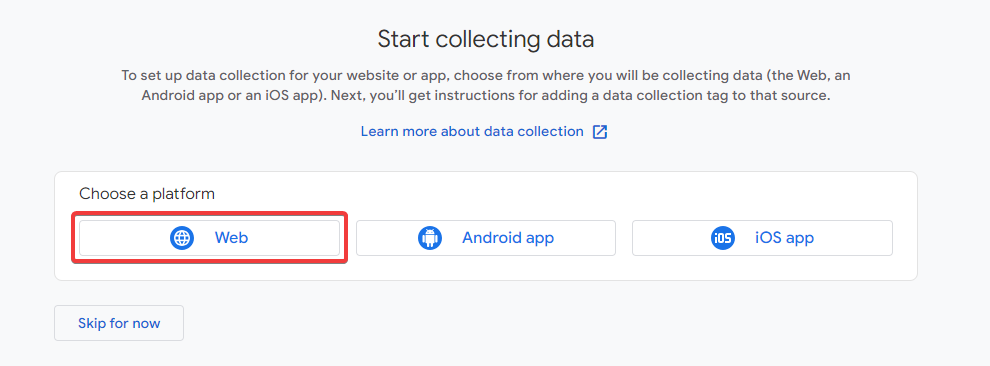
Open the “Start collecting data” page and click the “Web” Platform.
8. Set up the data stream.
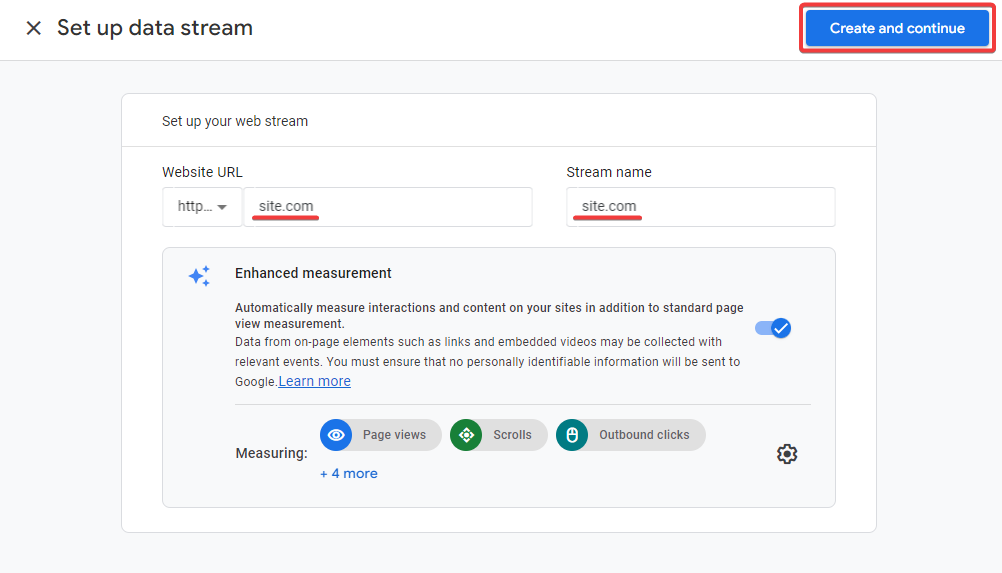
In the “Website URL” field, select your website’s protocol (either http or https) and enter the website’s name (domain name). In the “Stream name” field, enter the website’s domain name.
9. Web stream details.
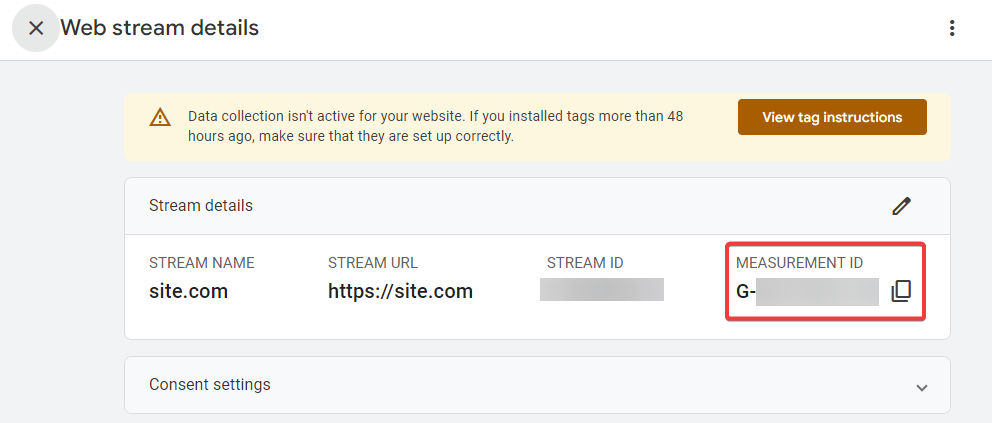
Write down your Measurement ID. Send it to your Exely support manager so that we could set it up for Booking Engine.
10. Set up the measurement tracker on your website.
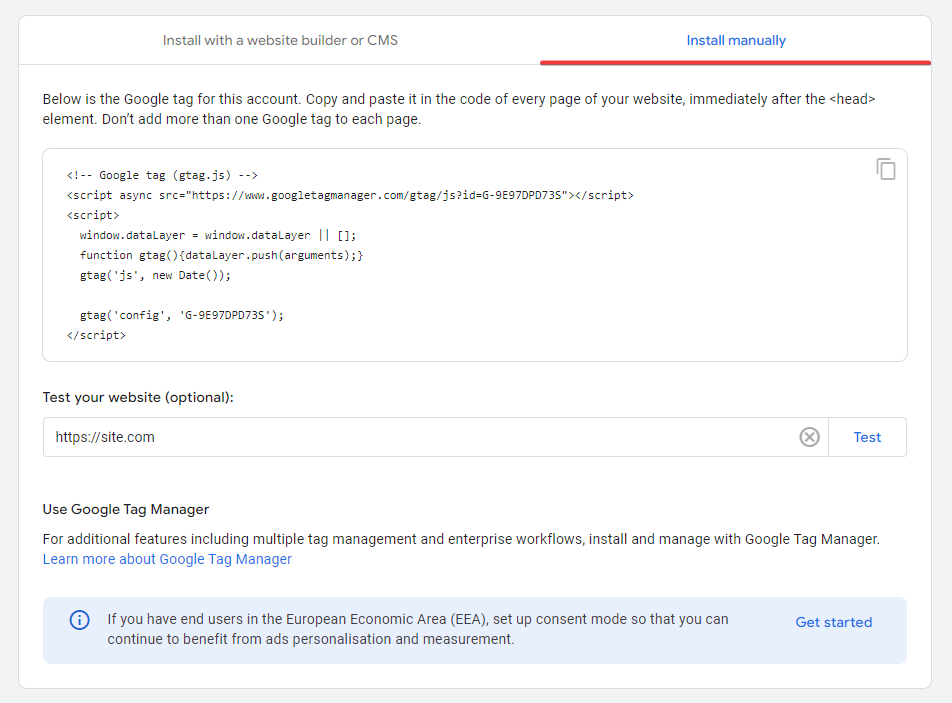
In the “Google tag” section, select the “View tag instructions” option. Go to the “Install manually” tab. Copy the Google Analytics code — the entire code in the opened window and set it up on your website.

11. Set the data retention.
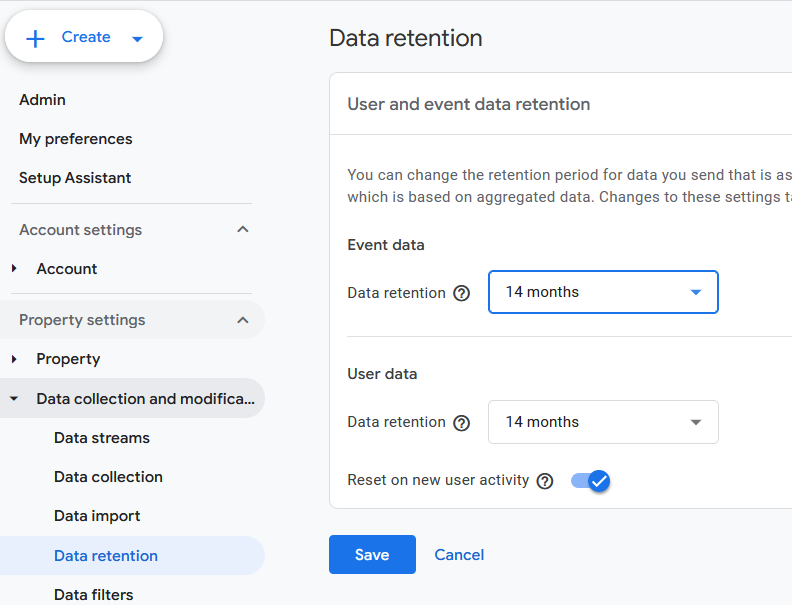
Go to “Data collection and modification” → “Data retention”. In the “Data retention” field, select “14 months”. By default, the reports are retained for just two months.
How to set up events and conversion funnel
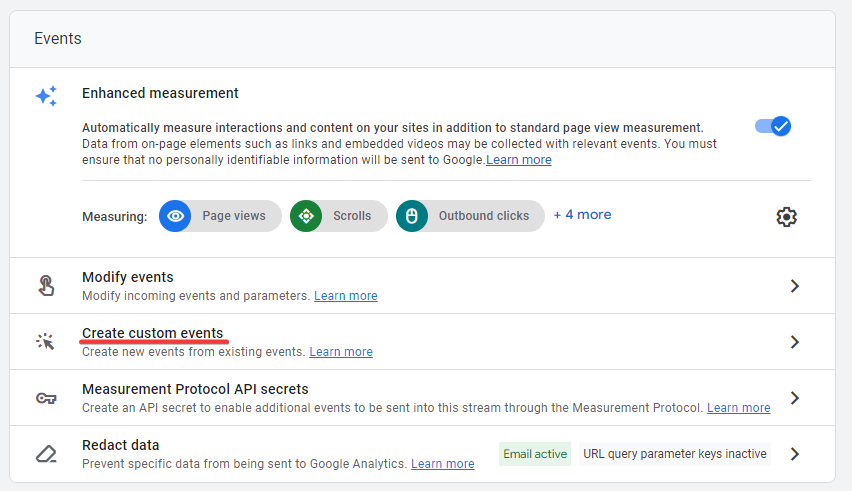
1. Go to the “Create custom events” tab.
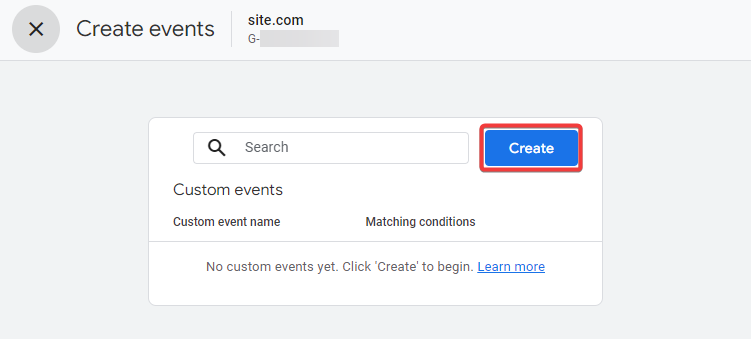
2. Click the “Create” button.
3. Create an event (aim) for the first step of the funnel.
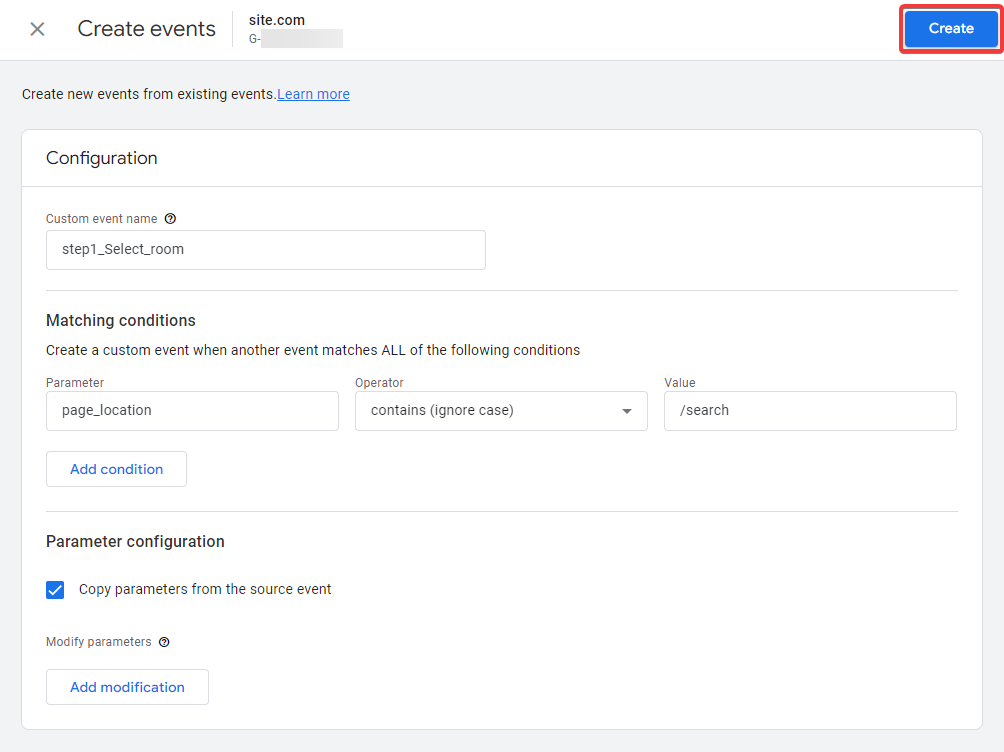
In the “Custom event name” field, enter the name of the first step of the funnel — “step1_Select_room”. You can choose any names for events, but they should not have any spaces.
In the “Matching conditions” section, select the following:
For the “Parameter” field, enter “page_location”
For the “Operator” field, select “contains”
For the “Value” field, enter “/search”
After you make the settings on the page, click the “Create” button.
4. Create an event (aim) for the second step of the funnel.
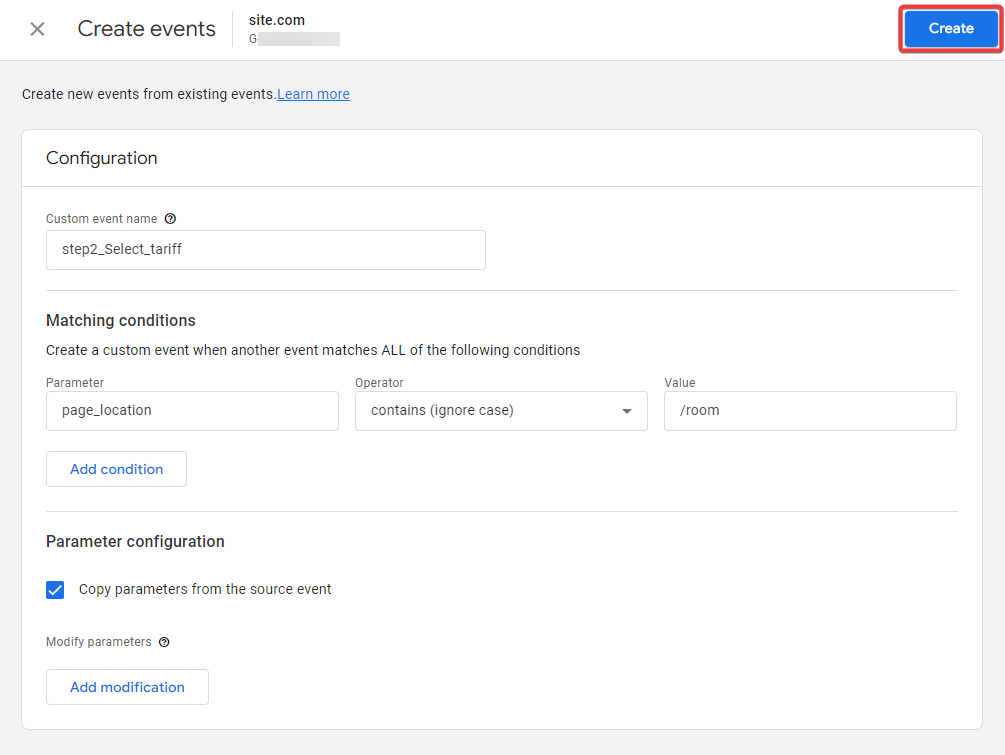
In the “Custom event name” field, enter the name of the second step of the funnel — “step2_Select_tariff”. You can choose any names for events, but they should not have any spaces.
In the “Matching conditions” section, select the following:
For the “Parameter” field, enter “page_location”
For the “Operator” field, select “contains”
For the “Value” field, enter “/room”
After you make the settings on the page, click the “Create” button.
5. Create an event (aim) for the second step of the funnel.
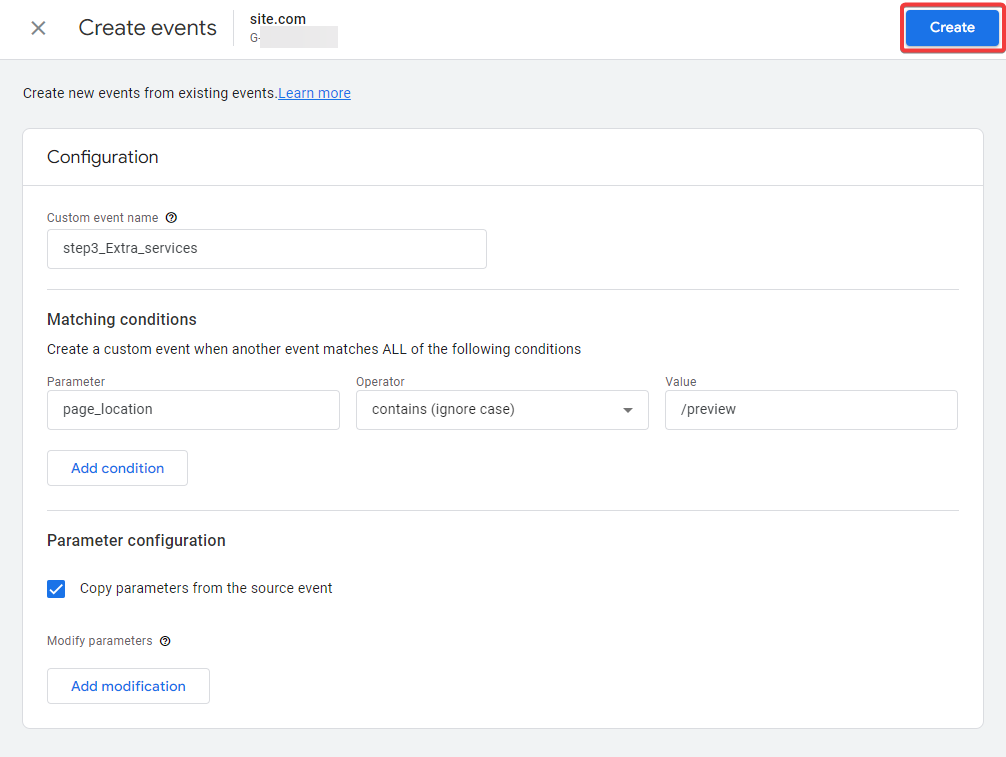
In the “Custom event name” field, enter the name of the second step of the funnel — “step3_Extra_services”. You can choose any names for events, but they should not have any spaces.
In the “Matching conditions” section, select the following:
For the “Parameter” field, enter “page_location”
For the “Operator” field, select “contains”
For the “Value” field, enter “/preview”
After you make the settings on the page, click the “Create” button.
6. Create an event (aim) for the third step of the funnel
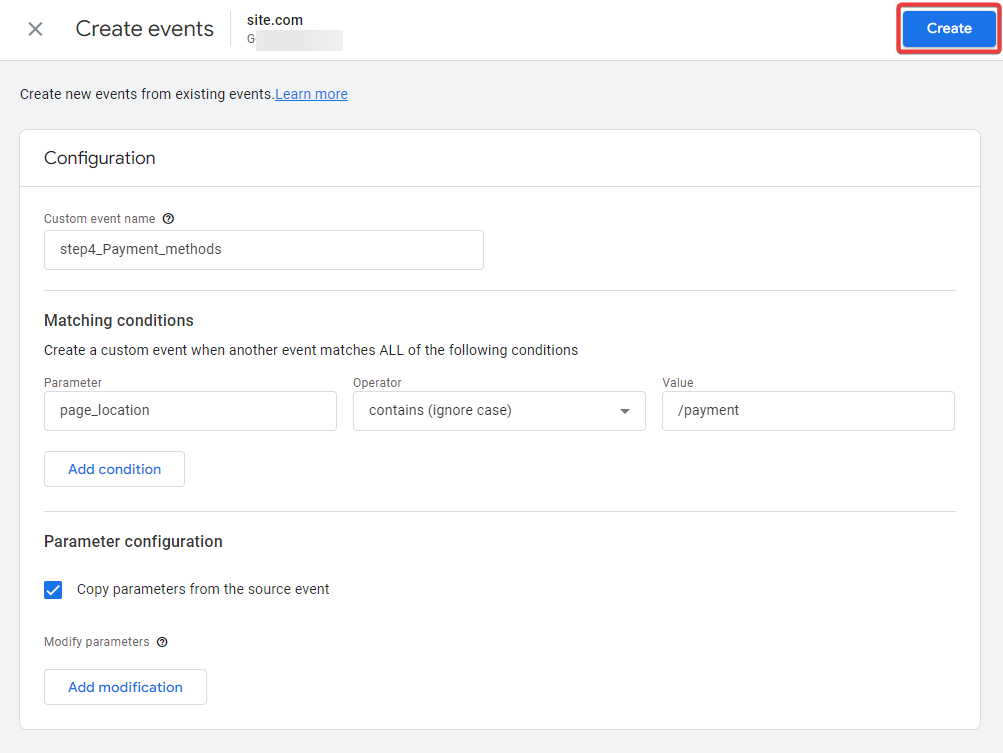
In the “Custom event name” field, enter the name of the third step of the funnel — “step4_Payment_methods”. You can choose any names for events, but they should not have any spaces.
In the “Matching conditions” section, select the following:
For the “Parameter” field, enter “page_location”
For the “Operator” field, select “contains”
For the “Value” field, enter “/payment”
Then, click the “Create” button.
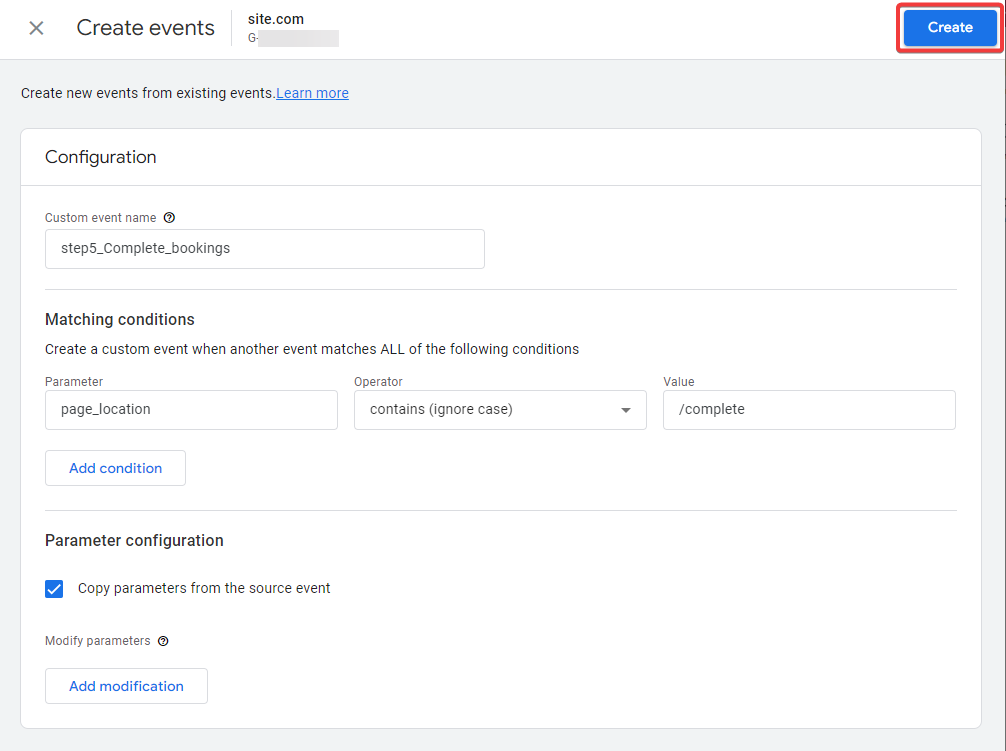
7. Create an event (aim) for the fourth step of the funnel
In the “Custom event name” field, enter the name of the fourth step of the funnel — “step5 _Complete_bookings”. You can choose any names for events, but they should not have any spaces.
In the “Matching conditions” section, select the following:
For the “Parameter” field, enter “page_location”
For the “Operator” field, select “contains”
For the “Value” field, enter “/complete”
Then, click the “Create” button.
8. Create conversion events (for Google Ads)
After everything is set up and functions well, there will be a list of events that you created. To enable the conversion events, click the switch bar.

How to create ecommerce reports
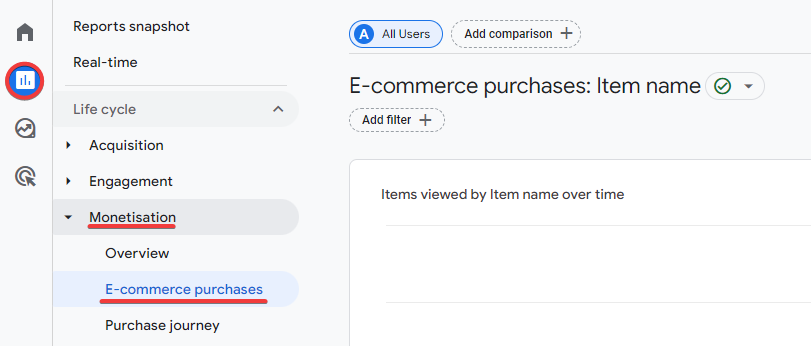
1. The standard ecommerce report
To view a standard report, go to “Reports” → “Monetisation”→ “E-commerce purchases”.
2. The extended report
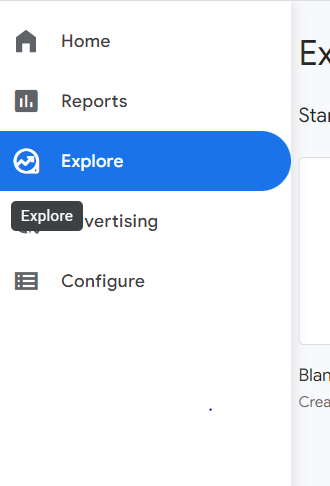
You can also create the extended report.
1. Go to “Explore”.
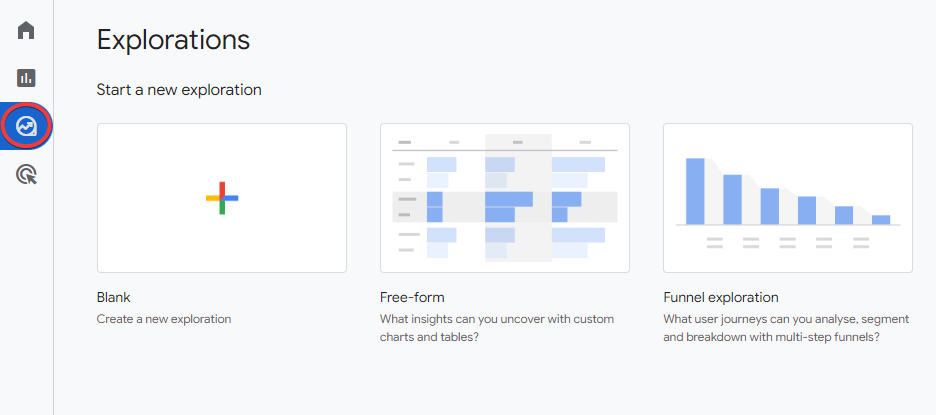
2. Create a new exploration.
Tap the blank exploration form to create a new exploration.
3. Fill out the following fields:
Analysis name
Custom: indicate the date you need
Dimensions: select the “Product Name” and “Transaction ID”
Metrics: select “Product Revenue”
Rows: select the “Product Name” and “Transaction ID”
Values: select “Product Revenue”
You will get a report with Booking IDs, price rates and the inventory.