To successfully attract guests, it is crucial to always maintain prices up-to-date on the property's website. When prices are missing, guests are unable to complete their bookings and often switch to OTAs, where prices are always available.
To help hoteliers avoid situations where current prices are not displayed in the booking engine, a new feature has been introduced in Exely Suite — a default rate plan with a season calendar. It allows prices in the booking engine to be automatically extended, even if the property staff forget to update the standard rate plans.
Using the default rate plan helps to:
Ensure prices are displayed even when prices in rate plans are not set or not uploaded from the PMS.
Reduce the risk of losing guests due to missing prices for future dates.
Flexibly adjust rate plans based on seasons, keeping offers competitive and aligned with the market conditions.
What is default rate plan and season calendar
Default rate plan is a rate plan that is applied in the booking engine when a property has no other current prices set. The default rate plan is automatically extended, ensuring that guests always see a price available for booking.
Season calendar — is a time period during which the hotel sets specific prices based on expected demand levels. The default rate plan consists of the seasons.
Pay attention. If you use Exely Price Assist, price levels and seasons created in the “Price assist” section are independent of the default rate plan season settings.
Default rate plan is available for all properties by default except properties that work in the flats and apartments mode or use the booking engine for resorts.
How to enable and set the default rate plan
Step 1. Create and set seasons
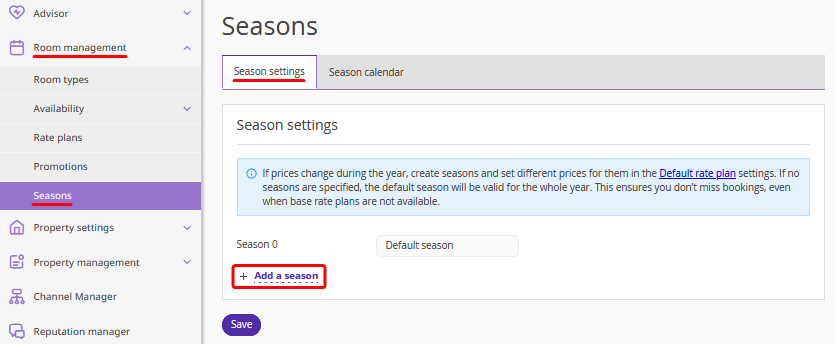
In the Exely extranet, go to the “Room management” > “Seasons” section > the “Season settings” tab. By default, one season is created that covers the entire year. It cannot be deleted or renamed — the “Default season”.
Click the “Add a season” link and create additional seasons, if required (for example, peak season, low season, etc.).
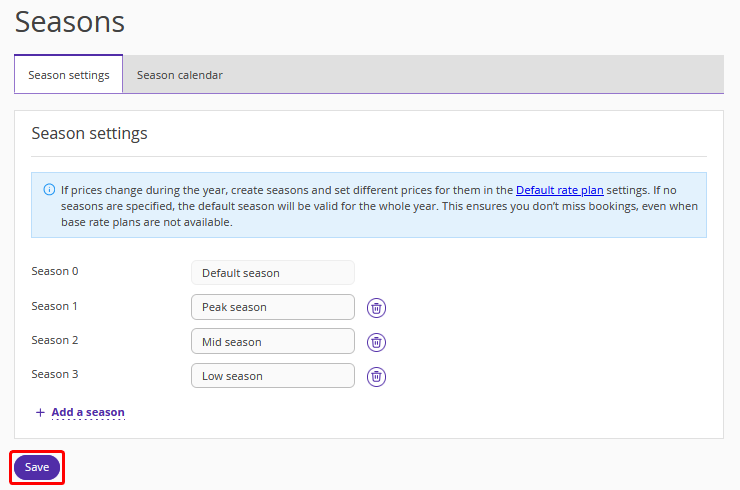
When all required seasons are created, click the “Save” button.
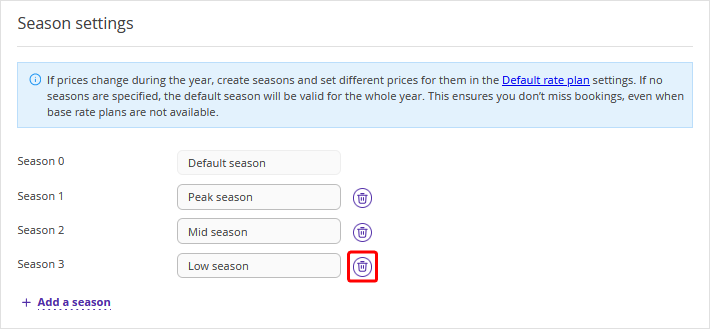
To delete a season, click the icon on the right of the season.
Pay attention. Even if you do not create any additional seasons, the default season is applied to the entire year. You only need to set prices for the default season.
Step 2. Set season periods
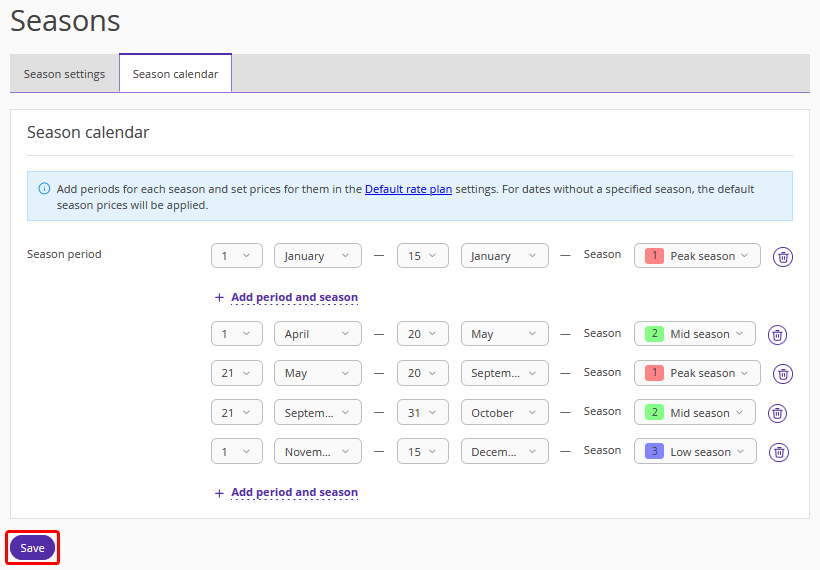
Switch to the “Season calendar” tab and click the “Add period and season” link to create periods for each season.
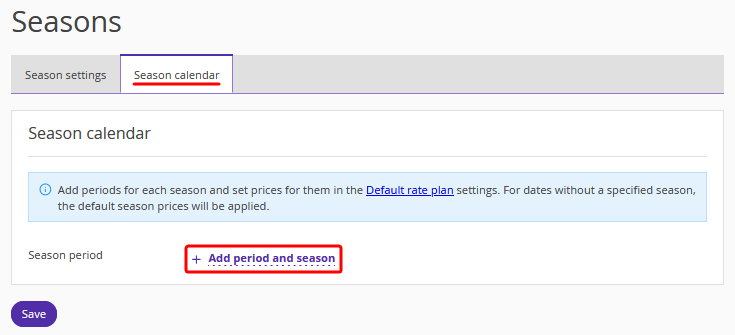
In the opened fields, select dates and a period that will be applied to the period. When all required periods are added, click the “Save” button.
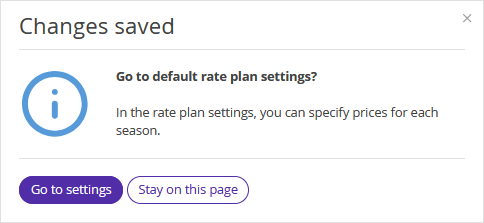
A window will pop up prompting you to proceed with creating the default rate plan. Click the “Go to settings” button to immediately create the default rate plan. Or select “Stay on this page” to continue working with periods.
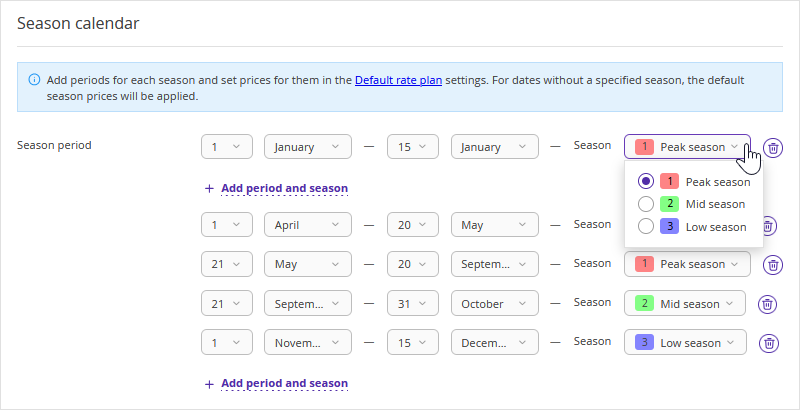
You can change the period dates and season, if required.
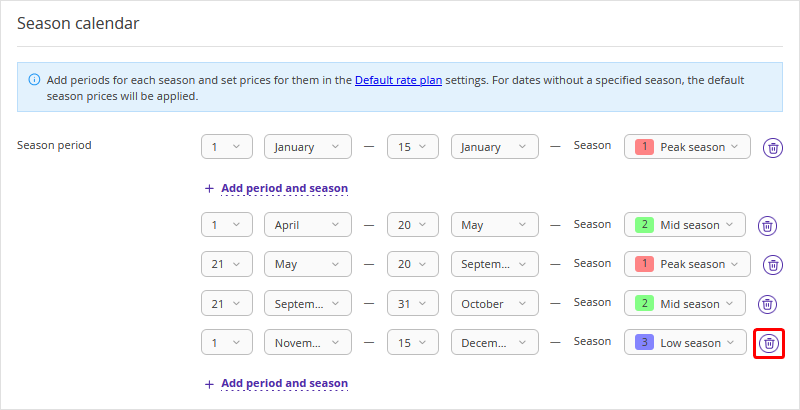
To delete a season period, click the icon on the right of the period.
After making any changes to the season periods, click the “Save” button.
Pay attention:
The created periods will repeat annually on the selected dates.
Periods do not overlap.
If there are dates between periods that are not covered by any season, the default season will be applied to those dates.
The period can be adjusted at any time, and the changes will affect all future dates.
Step 3. Create the default rate plan
Go to “Room management” > “Rate plans”. Above the list of rate plans, you will see a prompt about the option to create the default rate plan.
To proceed with creating the default rate plan, click the link in the prompt or the “Create default rate plan” button.

Enter the public and internal name for the rate plan.
Select the currency and a meal type for the rate plan. If a meal is not included into the rate plan, select "No meal included". Then, click the “Save” button.
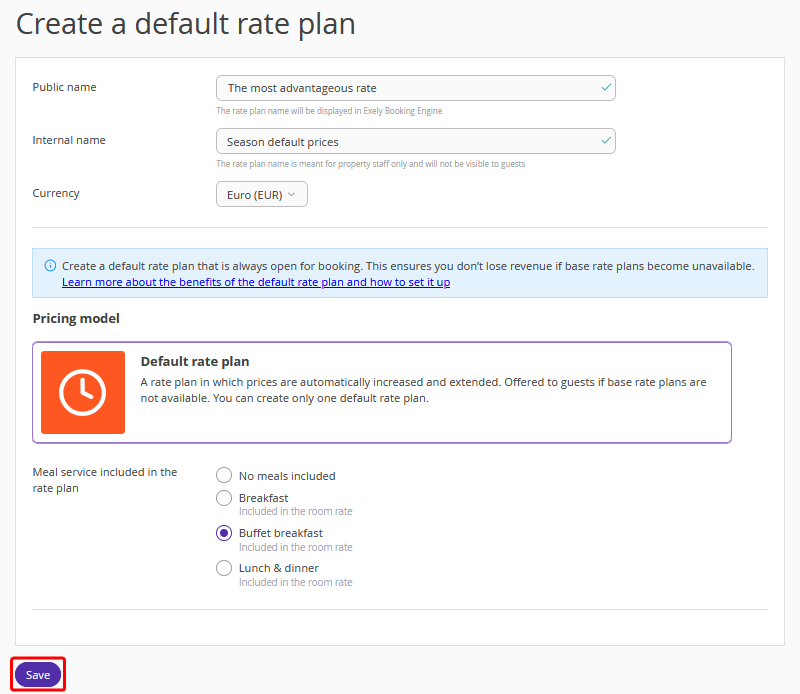
The default rate plan is created. Proceed with further settings.
“General settings” tab
1. In the "Room types" drop-down list, select the room types available for the selected rate plan.
2. Select if prices should be the same or different for business days and days off.
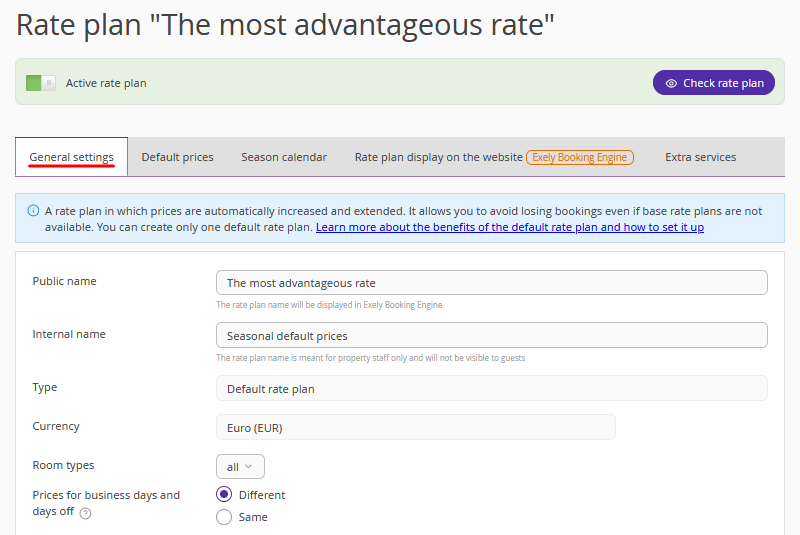
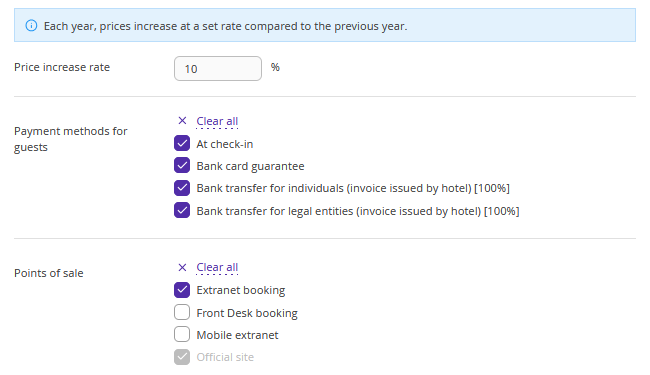
3. Specify the price increase rate.
4. Select the required payment methods.
5. Select the points of sale where the rate plan should be available.
Pay attention. The “Official site” option is enabled by default and cannot be disabled.
6. In the “Main rules” section, select the booking rules that should be applied to the rate plan.

7. Click “Save”.
“Default prices” tab
Set the prices to make a rate plan active.
If on the “General settings” tab you selected that prices should be different for business days and days off, specify the prices on business days and days off for all room types for all created seasons.
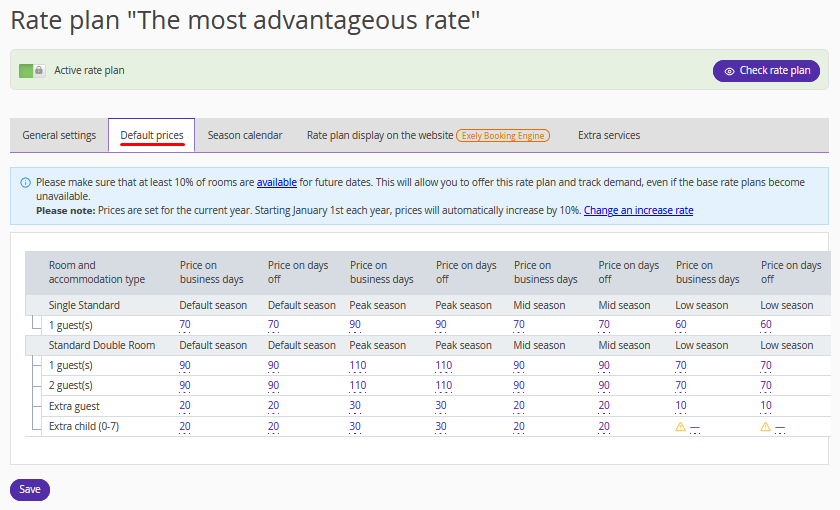
If on the “General settings” tab you selected that prices should be the same for business days and days off, specify the prices in the “Price on business days” column for all room types for all created seasons. Prices for days off will be automatically copied from the “Price on business days” column.
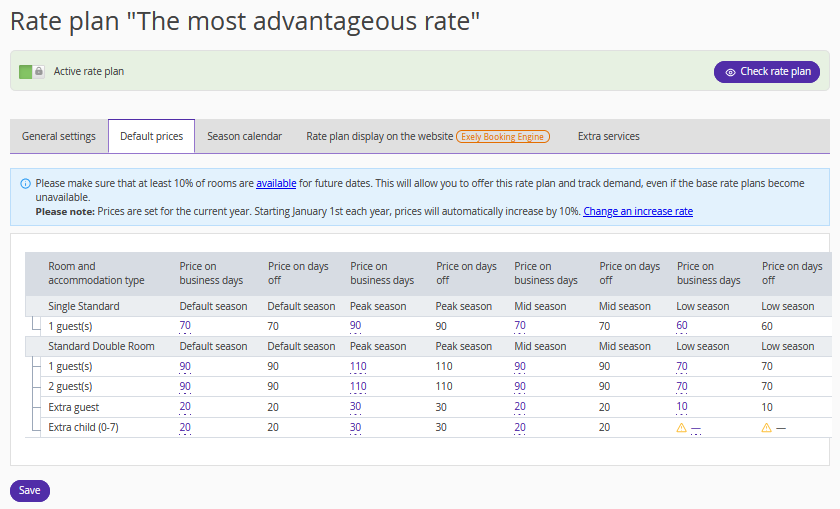
Pay attention:
If a price is not specified for a specific season, the price from the default season will be applied.
Every year, on 1 January, prices are automatically indexed by the percentage specified in the “General settings” tab, allowing you to set prices several years in advance.
“Season calendar” tab
On the “Season calendar” tab, you can view the set prices. It is not possible to edit prices for a specific date in the calendar, prices can only be set on the “Default prices” tab. There are no restrictions for the default rate plan.
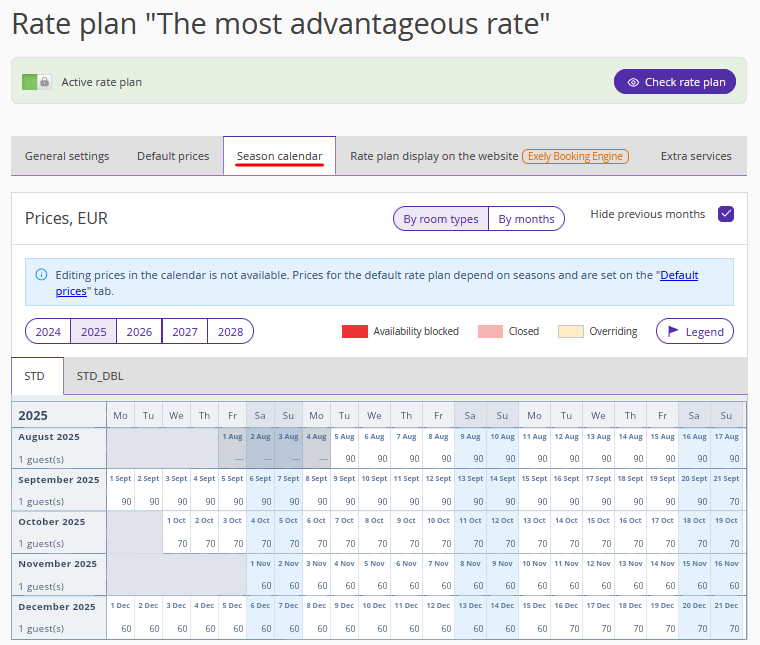
“Rate plan display on the website” tab
1. Add a detailed description of the rate plan.
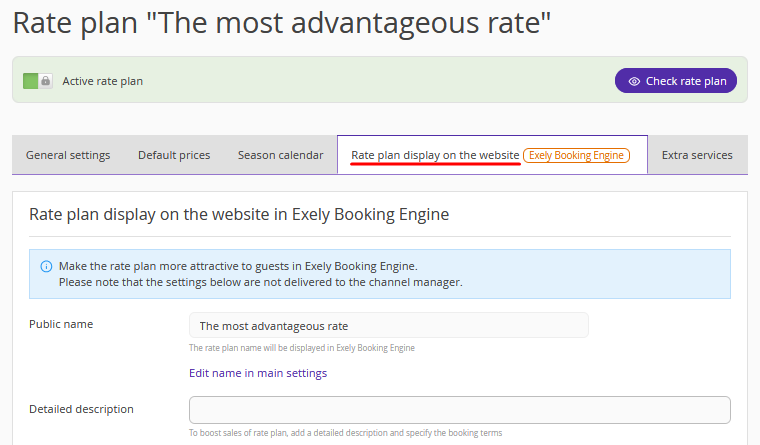
2. Upload a thumbnail and a promo image to the rate to attract guests’ attention.
3. Click “Save” at the top of the page.
“Extra services” tab
You can add extra services, which motivate guests to book.
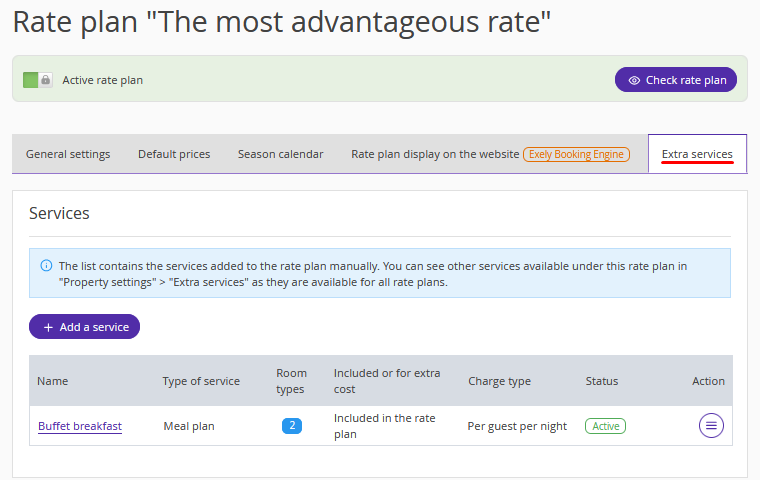
Save the changes.
The default rate plan starts working automatically — if there are no other rate plans available for the selected dates in the booking engine or on the property’s page in Google Hotel Ads, the default rate plan will be displayed.
If the booking dates fall on the boundary of periods, and standard rate plans are available for some days but not for others, a guest will not be able to complete the booking without the default rate plan. With the default rate plan enabled, the system will offer this rate to the guest, allowing them to proceed with the booking.
Features
Only one default rate plan can be created in the property's Exely extranet.
The default rate plan is always available to all guests. It cannot be
restricted by promo codes;
limited only to loyalty program members;
hidden in the booking engine using restrictions or additional display settings.
To close sales for the default rate plan, you need to close availability for the required dates. If all rooms are booked, the default rate will no longer be available for booking.
The default rate is a backup rate plan: it does not replace standard rate plans, but serves as a safety net in case no prices are set.
The default rate is automatically extended. You only need to set it up once, and the system will maintain up-to-date prices automatically. You will not lose bookings even if you forget to update your standard rate plans.
The default rate is displayed only in the booking module and Google Hotel Ads, if there are no other rate plans available for the selected dates.
The default rate plan is not available for mapping in Exely Channel Manager, and prices are not uploaded to channels.
In case of PMS integration, the default rate plan can be mapped and will be passed to PMS as any other rate plan. However, prices cannot be loaded from PMS into the default rate plan.
If you need to delete the default rate plan, contact your Customer Support manager or Exely Customer Support team.
If the price increase rate is modified, the prices will be recalculated for future periods. Prices for past periods will not change.
The default rate plan cannot be used for dynamic rate plans.
The default rate plan can be used as a source rate plan for a combined rate plan (Rate Mix).
Derived rate plans cannot be created from the default rate plan.
All discounts created in the Exely extranet can be applied to the default rate plan.
The default rate plan cannot be edited in the Exely Hotelier mobile app.
Booking confirmations for hotels and guests display only the name of the rate plan for which the booking was made, without any additional information.