Add new guest statuses in Exely PMS using a reference. Statuses are assigned to guests in the booking card or guest profile and help property staff to provide personalized service to each guest.
How to add a new guest status
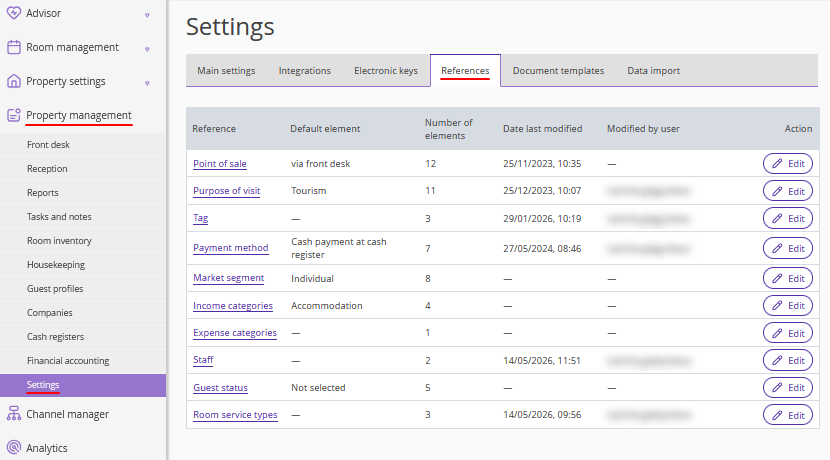
1. In the Exely extranet, go to “Property management” > “Settings” section > the “References” tab.
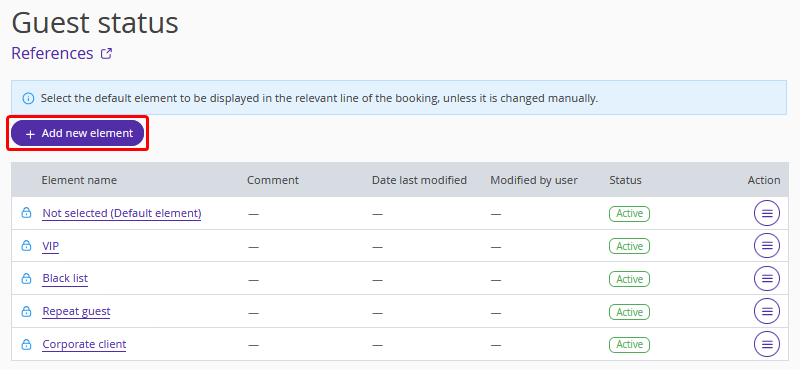
2. Open the “Guest status” reference and click the “Add new element” button.
3. Enter the status name and click the “Apply” button.
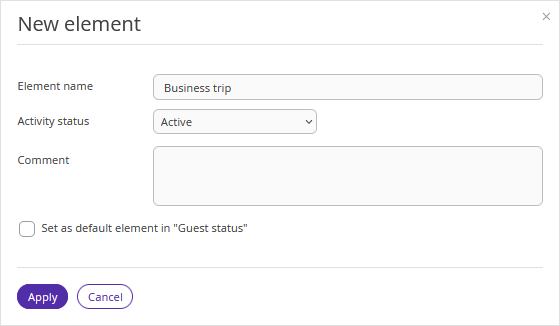
If you tick the "Set as default element in "Guest status" check-box, this status will be displayed in the profiles of all new guests, unless it is changed manually. If this is not needed, leave this option unchecked.
4. Click the "Save" button at the top of the page.
5. The new status will appear in the list and will be available for selection in the booking card or guest profile.
Pay attention. Information about the guest's status is only visible in Exely PMS Front Desk. The statuses are for informational purposes only and do not affect the ability of a guest or an employee of the hotel to make a reservation.
For example, a guest with the "Blacklist" status can book a room on the website or through the sales channel, and the property employee can create a booking for this guest in Front Desk. A guest with the "VIP", "Repeat guest" or "Corporate client" status, etc. does not receive additional privileges when booking.
How to deactivate or delete a status
1. Go to the "Property management" > "Settings" section > the "References" tab and open the "Guest status" reference.
2. Click the “Action” button and select the required action to disable or delete a status. Save the changes.
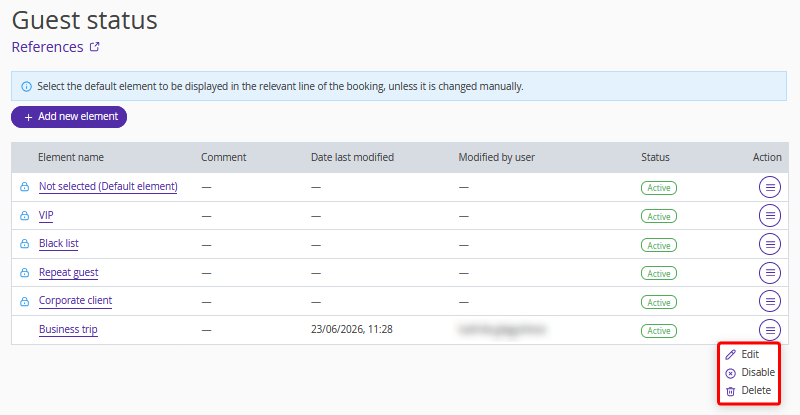
Pay attention. Statuses created by default, which are marked with a padlock icon, cannot be deleted or deactivated.