You can create a separate invoice for extra service in two ways:
By adding a service to a booking;
By editing an invoice.
How to create a separate invoice when adding an extra service
To add an extra service to a booking and issue a separate invoice, take the following steps:
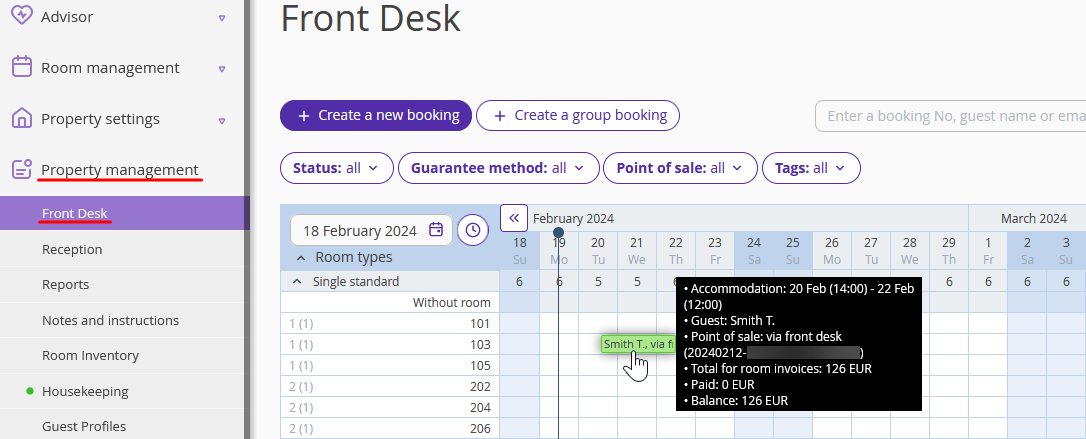
1. In your Exely extranet, go to “Property management” > “Front desk” and click the required booking.
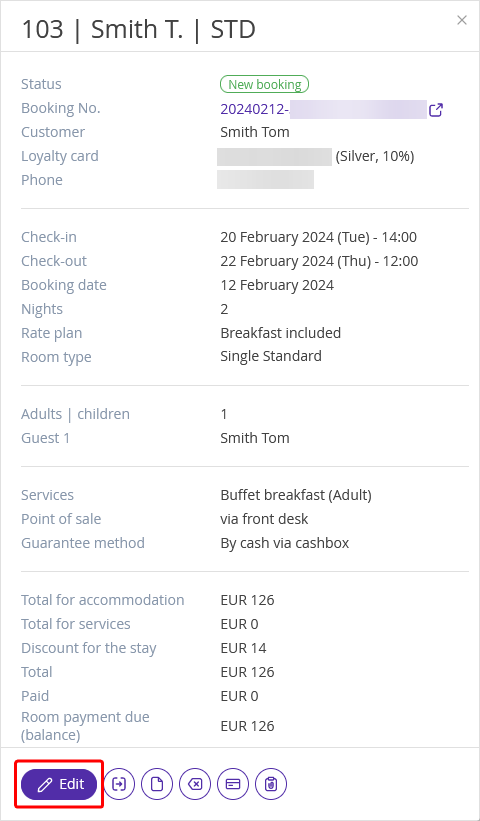
2. In the opened window with brief booking details, click the "Edit" button at the bottom of the page.
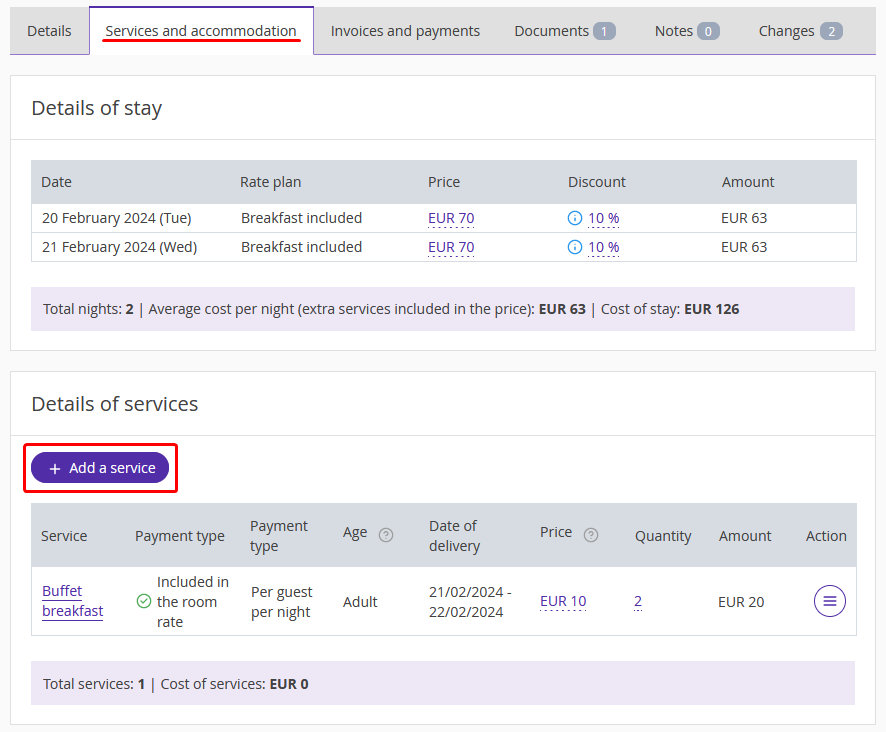
3. On the booking details page, switch to the “Services and accommodation” tab and click the “Add a service” button.
4. In the pop-up window, select the required service. In the “Invoice” field, select the “New room invoice” option.
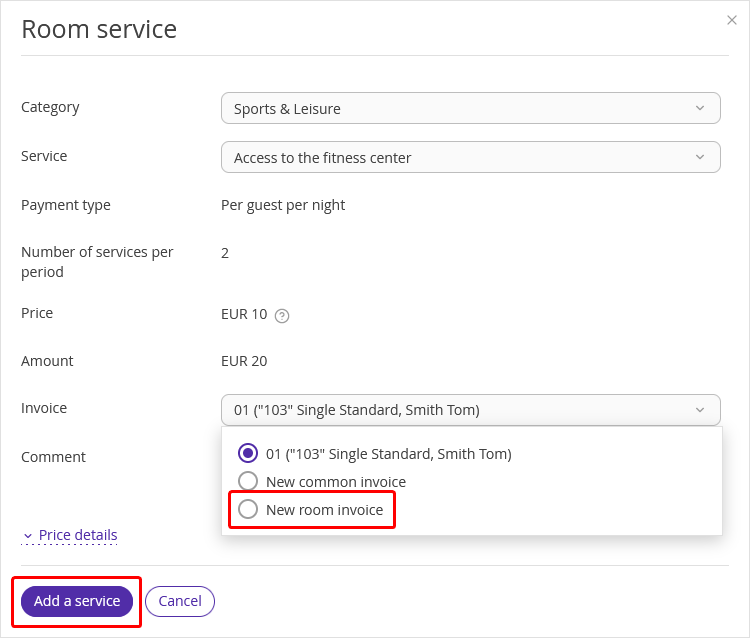
5. Click the “Add a service” button. Then, click the “Save” button at the top of the page.
6. Go to the “Invoices and payments” tab to confirm a payment for the new invoice.
How to include an extra service in a separate invoice
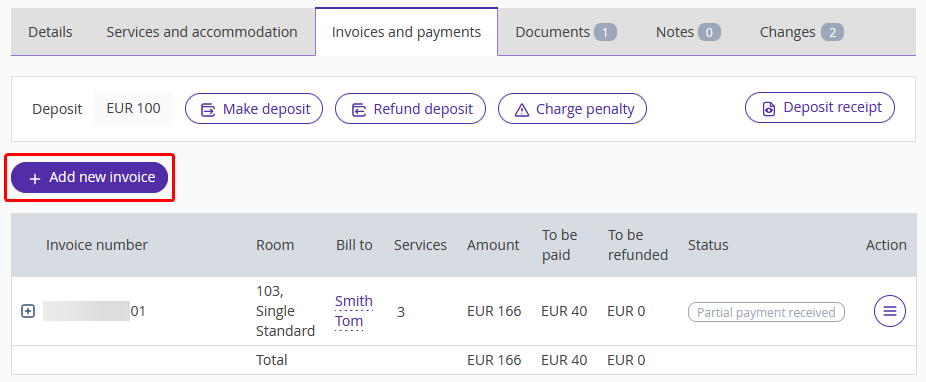
1. On the booking details page, switch to the “Invoices and payments” tab. Click the “Add new invoice” button.
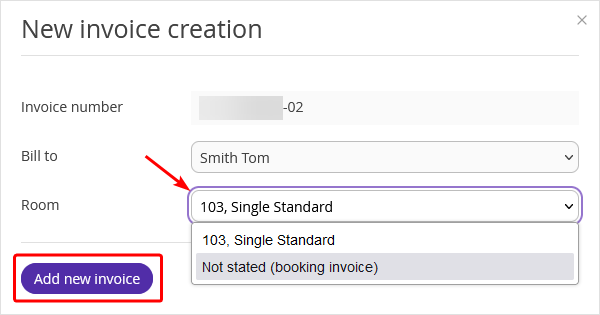
2. In the pop-up window, click the "Room" field and select the “Not stated” option if you need to issue an invoice specifically for an extra service. Click the “Add new invoice” button. Then, click the “Save” button at the top of the page.
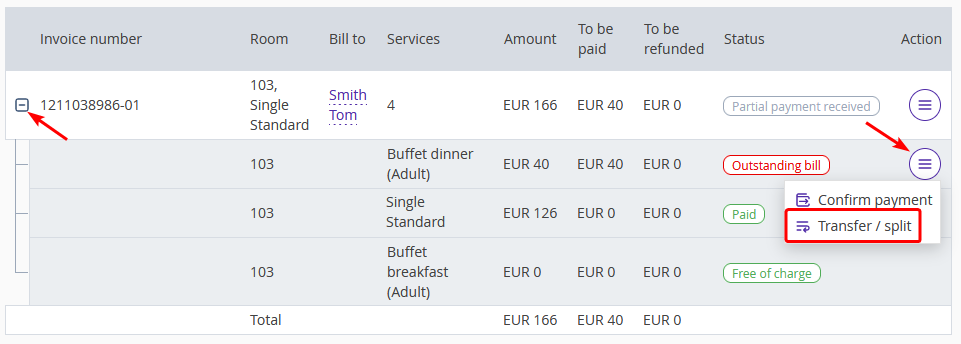
3. You will see two invoices. Click on the icon next to the number of the first invoice.
The price breakdown will be opened. There, find the service you need to charge for with a separate invoice. Click the “Action” button on the right and select the “Transfer/split” option.
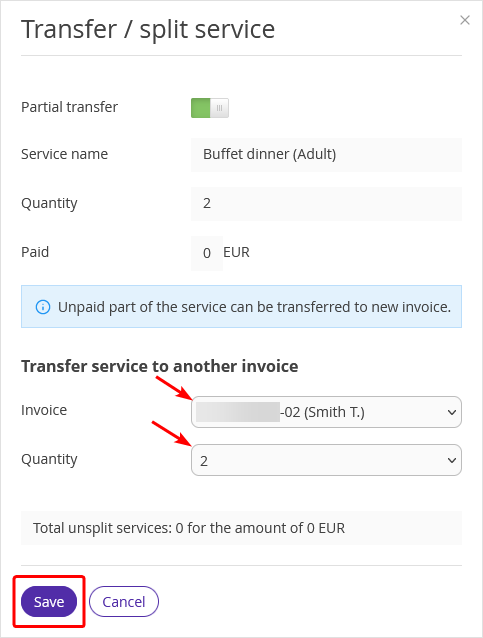
4. In the window opened, select the required invoice and enter the quantity of the services you want to transfer. Then, click the “Save” button.
5. Click the “Save” button at the top of the page.
6. Confirm payments when the guest makes a payment. Save the changes.