Integrate VingCard and Exely PMS to easily assign an electronic key to a specific room.
Once the integration is set up, you can quickly issue a key card for a room directly in Exely PMS when a guest checks in.
The WebSocket protocol, which is used to exchange data, officially supports Windows 8 and higher. If your Windows operating system version is lower than 8, update your OS to work with electronic keys.
Note. The steps provided in this article must be performed on a computer in a key management software provided by VingCard — VISIONLINE. However, this software should be turned off before installing and using Exely Agent.
Pay attention. Exely PMS only supports integration with original factory locks from the official manufacturer. Using other locks may result in the system malfunctioning.
Install and configure Exely Agent
Exely Agent is an app for Windows which is used for data exchange between VISIONLINE and Exely PMS. Exely Agent allows coding electronic keys in Front Desk.
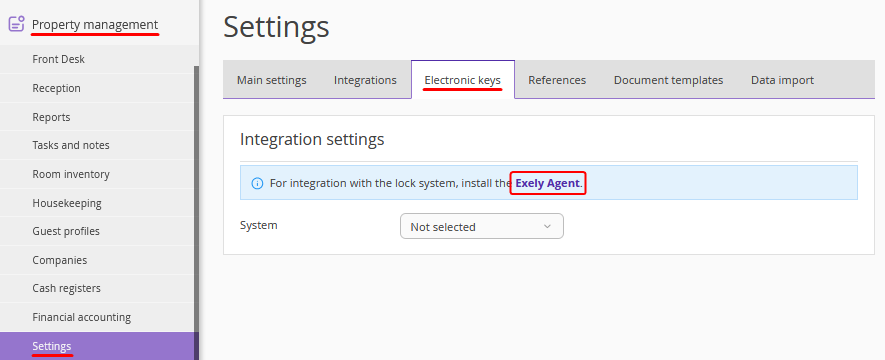
In the Exely extranet, go to “Property management” > “Settings” > the “Electronic keys” tab. Download Exely Agent and set it. For details, refer to the instruction “How to install and set Exely Agent”.
Pay attention. Windows 7 does not support websocket. Exely Agent does not work on Windows 7 or below. It is available on Windows 8 and 10.
Set up VISIONLINE
1. Open VISIONLINE and enter the login and password. Go to “Lists” > “Devices” and click “Add”.
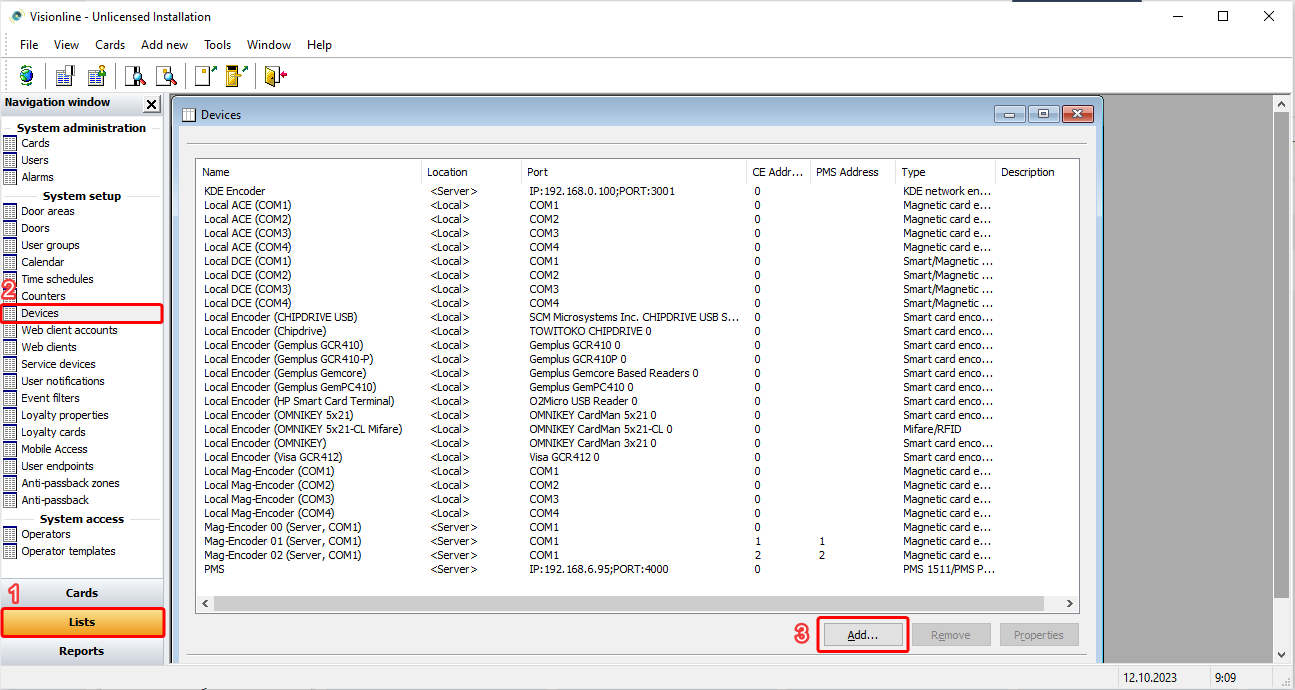
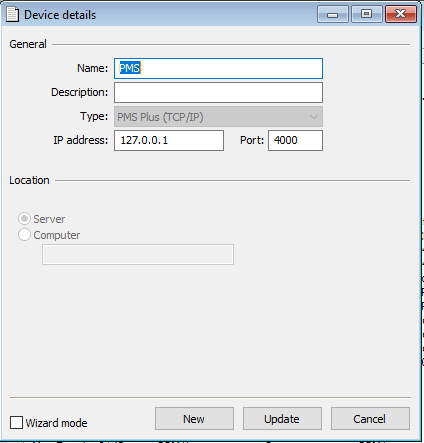
2. A new window will be opened:
in the “Name” field, enter any name;
the “Description” field can be left empty;
in the “Type” drop-down list, select “PMS Plus (TCP/IP)”;
indicate 127.0.0.1 in the “IP address” field;
in the “Port” field, set 4000;
click “New”.
Pay attention. If you plan starting Exely Agent on a different computer, enter the IP address of that computer and make sure the Firewall settings on the computer where VISIONLINE is installed allow incoming TCP-connection via the port indicated in the “Port” field.
3. Make sure the card encoder in VISIONLINE has the “Server” mode set up and not the “Computer” mode.
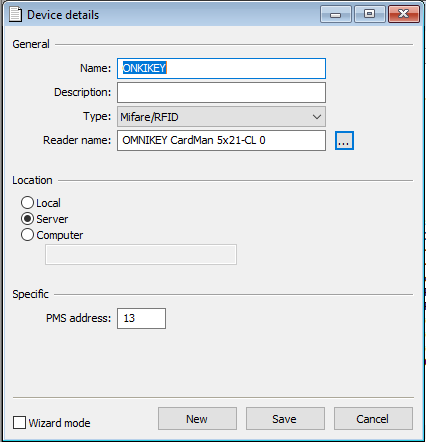
If you already have the device set up with the “Computer” location, duplicate it with the “Server” location or delete it and set up a new device with the “Server” location. To create a new device:
go to “Lists” > “Devices” and click “Add”.
indicate any name;
select the “Mifare/RFID” type;
in the “Reader name” drop-down list, select the encoder;
indicate the PMS address: enter any number from 1 to 99. Make sure there are no other devices with the same PMS address in VISIONLINE;
click “New”.
Set up Exely PMS
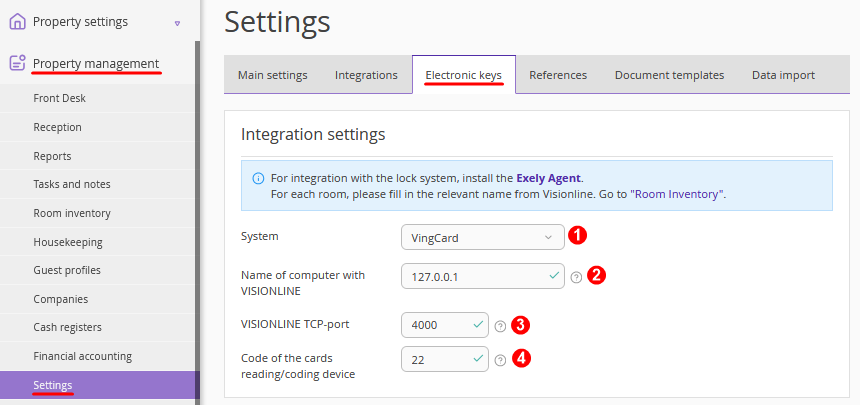
1. In the Exely extranet, go to “Property management” > “Settings” > the “Electronic keys” tab.
2. In the “Name of computer with VISIONLINE” field, enter the name or IP address of a computer with VISIONLINE installed. If Exely Agent and VISIONLINE work on the same computer, indicate 127.0.0.1 address.
3. In the “VISIONLINE TCP-port” field, enter 4000.
4. In the “Code of the cards reading/coding device”, enter the same number indicated in the “PMS address” field in the VISIONLINE settings (see point 3 in the “Set up VISIONLINE” instructions above).
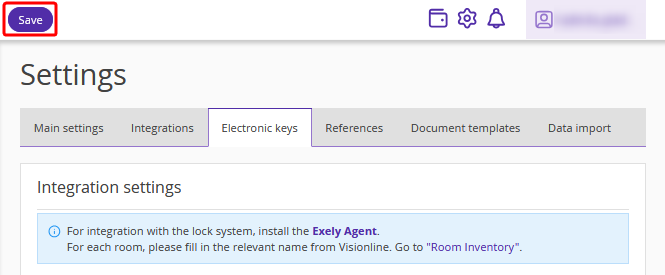
5. Save the changes.
Set the room inventory
Go to “Property management” > “Room Inventory” > the “Rooms” tab and make sure all rooms in the “Lock system number” column are indicated the same way as in the "Doors" section in VISIONLINE.
If these names do not match, you will not be able to code the keys from Exely PMS.
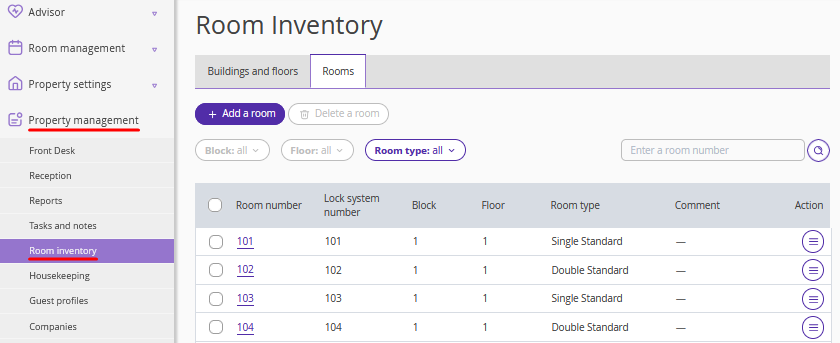
Click the room number in the list. Use the numbers from the "Doors" section in VISIONLINE to fill in the "Lock system number" field. Click the "Save" button at the top of the page.
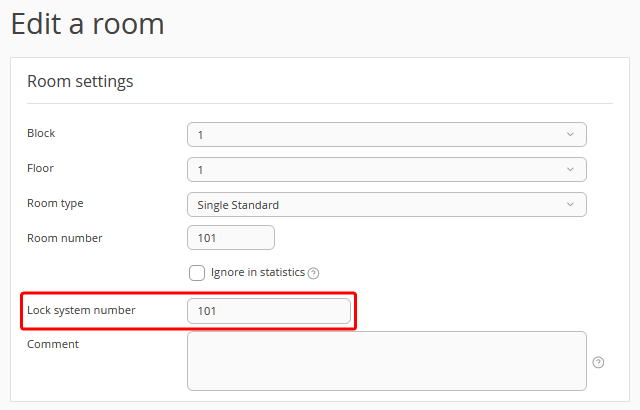
After specifying the lock system number for a room, click the "Save" button at the top of the page.
Once the room inventory settings are completed, the integration with VingCard electronic keys is set up.
Issue keys
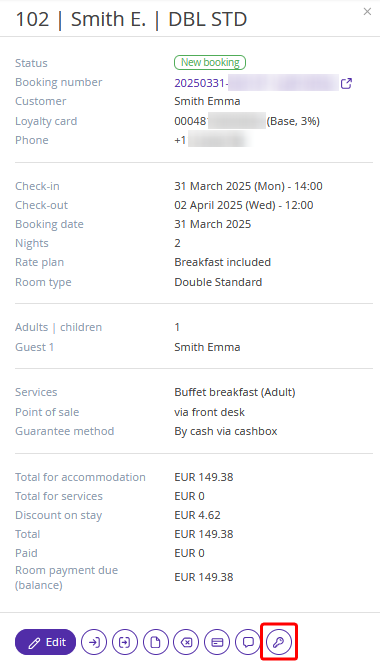
To issue a key to the guest’s booked room, left-click the required booking in the Front desk and click the “Key card issuance” button in the opened sidebar.
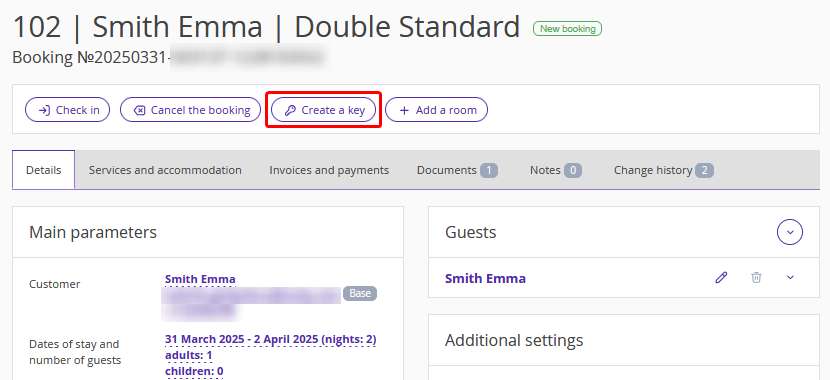
Or open the booking details page and click "Create key".
The key validity period is automatically set according to the guest’s check-in and check-out time. Select the number of keys and click “Confirm”.
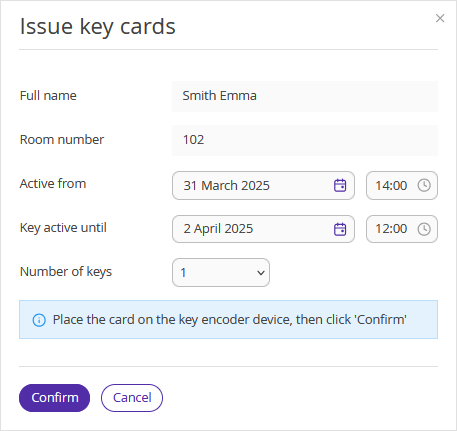
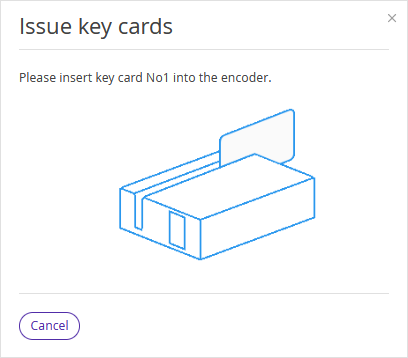
Place the key card onto the VingCard encoder to program the key.
Pay attention. When the first key for a room is created for a booking/stay, a so-called “new key” is generated. This key blocks all previously issued keys for the room, including key copies. When a second or subsequent key is created, a “copy key” is generated automatically. These keys work in parallel with the new key and with other copies.
If there are several reception desks (computers) with different encoders in your property, an administrator can issue a key by selecting the required encoder in the "Device" field. By default, the system will suggest the last used device.

Issue additional keys
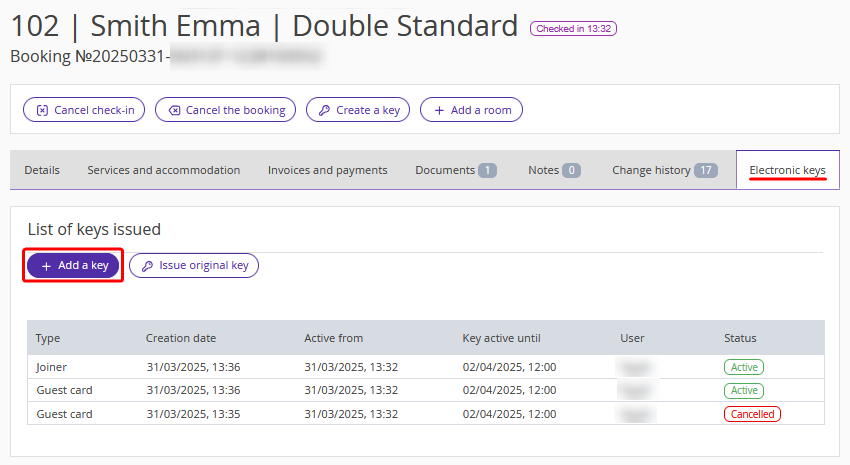
1. To issue keys for the second and subsequent guests staying in the room, open the booking details page, switch to the "Electronic keys" tab and click "Add a key".
2. In the opened window, select the second guest, insert a key card to the encoder and click "Confirm"
3. The list of issued keys shows valid cards of the following types:
"Guest card" — the first guest's key card;
"Joiner" — the additional key card for the second guest.
All previously issued key cards are blocked and have the "Cancelled" status.
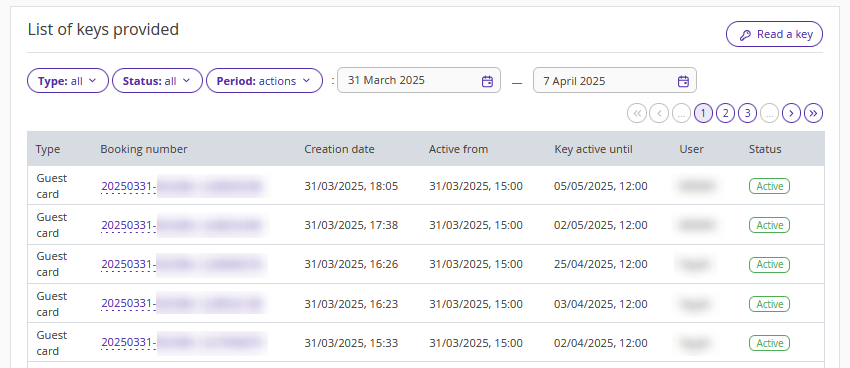
View the list of keys provided
To see when a key was issued, go to “Property management” > “Settings” > the “Electronic keys” tab and scroll to the “List of keys provided” section.