Set the “Free nights” promotion for sale in Exely Booking Engine.
Note. The “Free nights” rate plan is not displayed in the Exely extranet, if a property has Exely PMS or integration with other PMS and automatic upload of restrictions from the PMS is enabled.
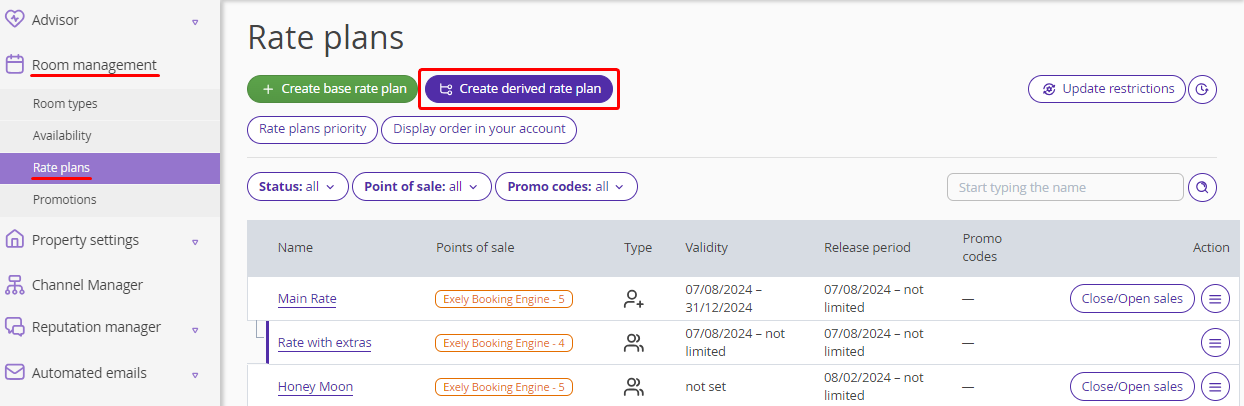
1. In the Exely extranet, go to “Room management” > “Rate plans”. At the top of the page, click the “Create derived rate plan” button.
2. Select the “Free nights” option.
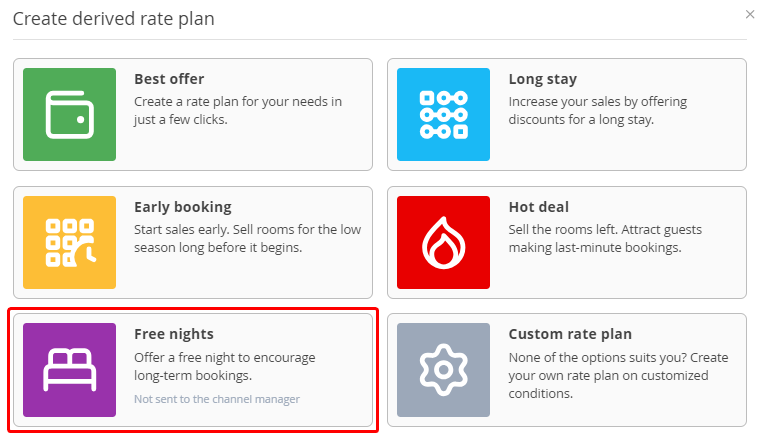
Note. The “Free nights” rate plan can only be offered in the booking engine. It cannot be offered in online distribution channels.
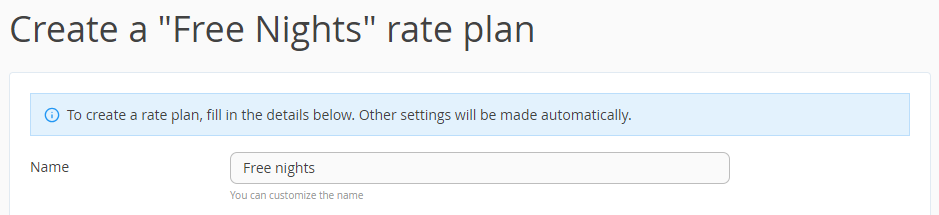
3. On the “General settings” tab, specify the rate plan name. By default, the rate plan is named “Free nights”. You can change it if needed.
4. Indicate how many nights can be booked at the rate plan. The last night will be free of charge. For example, if you write in “3” in the “Number of nights for reservation” box, the third night is free.

5. Select a base rate plan from which the discount will be calculated.

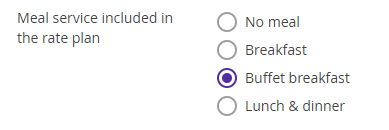
6. If the meals are included in the rate plan, select the meal option you need.
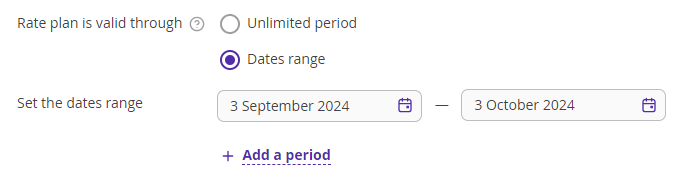
7. Set the “Rate plan is valid through” period.
Unlimited period — the “Free nights” rate plan settings will be valid if the prices in the parental rate plan are set.
Dates range — the “Free nights” rate plan settings will be valid on the specified dates, if the prices in the parent rate plan are set for this period.
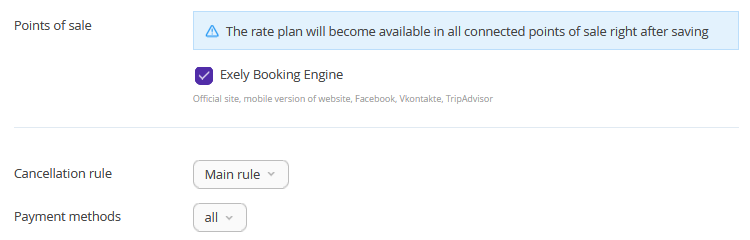
8. Select points of sale, cancellation rule, and payment methods. Click the “Save” button at the top of the page.
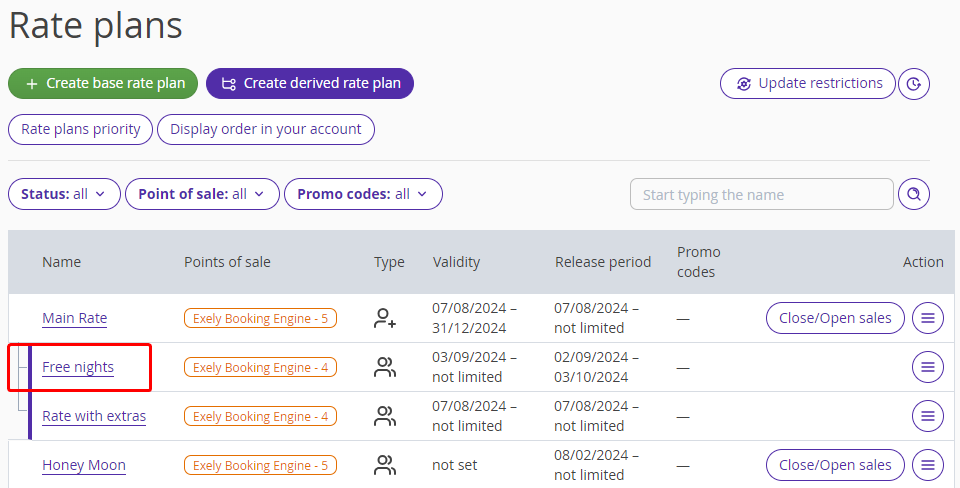
The rate plan will be listed at the “Rate plans” page.
How to set the “Free nights” promotion
General settings
1. Click the newly created rate plan name. The rate plan editing page will be opened on the “General settings” tab.
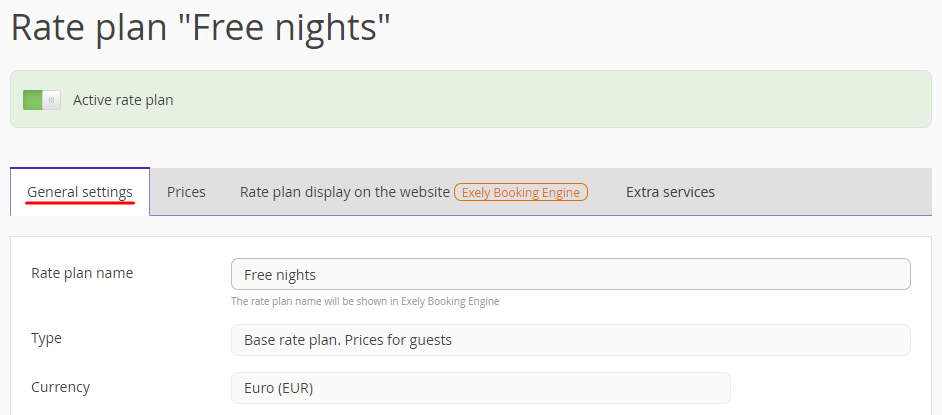
The type is specified when creating the rate plan, so it cannot be edited. Currency is taken from the parent rate plan. If necessary, you can change the name of the rate plan, and guests will see it in the booking engine. The default name is “Free nights”.
2. Tick the check-boxes for the required payment methods.

3. Select the points of sale.

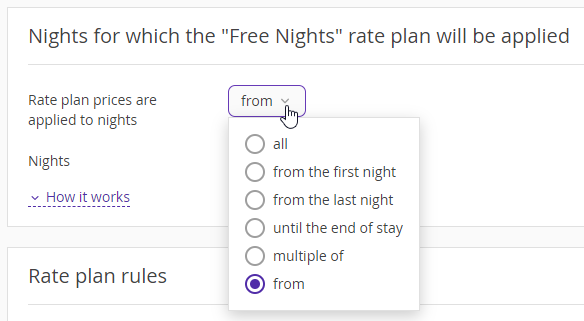
4. For the “Nights for which the “Free Nights” rate plan will be applied” settings, specify for what nights the rate plan prices will be applied:
All — the rate plan prices will be applied to all nights of stay selected by the guest during booking.
From the first night — the rate plan price will be applied when the guest selects X number of nights starting from the first night. Specify this number of nights.
From the last night — the rate plan price will be applied when the guest selects X number of nights starting from the last night. Specify this number of nights.
Until the end of stay — the rate plan price will be applied to all nights selected by the guest up to the last X nights. Specify this number of nights.
Multiple of — the rate plan price will be applied to each X number of nights. Specify the value.
From — the rate plan price will be applied to nights starting from X. Specify the value.
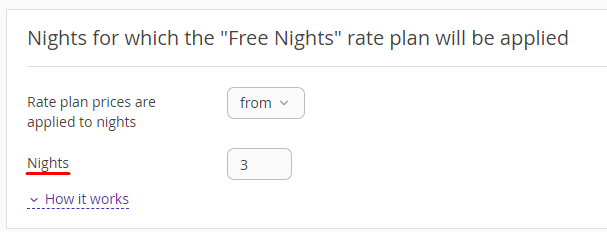
5. Specify the number of nights.
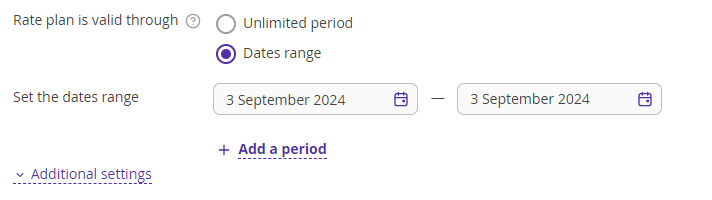
6. For the “Rate plan is valid through” setting, specify:
The period the rate plan is valid through: unlimited period or dates range. You can add a period, if required.
Period of stay.
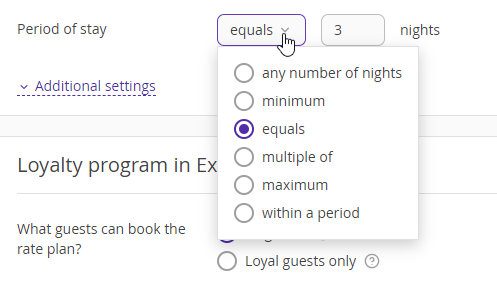
Any number of nights — the rate plan price will be applied to all nights of stay selected by the guest when booking.
Minimum — the rate plan price is applied when the guest books a stay of at least X number of nights. Specify this number of nights.
Equals — the rate plan price is applied for booking X nights of stay by the guest. Specify this number of nights.
Multiple of — the rate plan price will be applied for each X number of nights. Specify this value.
Maximum — the rate plan price will be applied to bookings for up to X number of nights. Specify this number of nights.
Within a period — the rate plan price will be applied to a booking for X to Y nights. Specify this number of nights.
7. If you have a loyalty program set up in your Exely extranet, select which guests the rate plan will be available for booking:
All guests
Loyalty guests only.

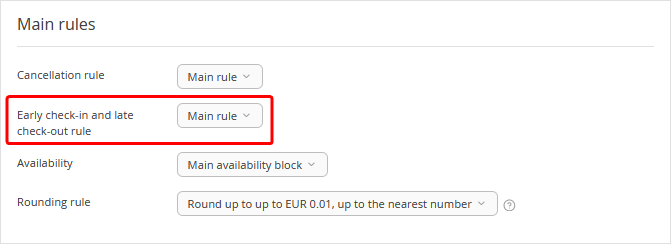
8. In the “Main rules” section, select the:
Cancellation rule.
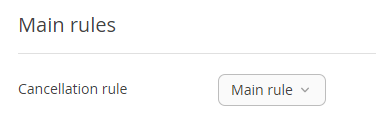
By default, the cancellation rule as in the parent rate plan is specified. For details on the cancellation rules, refer to the instruction “How to set up a cancellation rule”.
Early check-in and late check-out rule.

By default, the early check-in and late check-out rule as in the parent rate plan is selected. Details on early check-in and late check-out rules are available in the instruction “How to set an early check-in and late check-out rule”.
Availability.

“Main availability block” is selected by default. If you work with different availability blocks, select the required one from the drop-down list. Refer to the instruction “How to manage different availability blocks” for details.
Rounding rule.

Select the rounding rule from the drop-down list. See details in the instruction “What is rounding rule”.
9. Click the “Save” button at the top of the page.
Additional parameters
Note. The base settings are enough to work with the “Free nights” rate plan. Additional parameters allow you to customize the rate plan more flexibly for your needs.
1. Tick the check-boxes for days of the week when the rate plan is valid.

2. Select of the following settings:

Stay under the rate plan is available only within the rate plan validity period.
For example, a rate plan is valid from September 2 till October 2. This means guests will be able to book a stay at the rate plan only if the check-in and check-out dates fall within the specified period.
Stay under the rate plan is available within the period that falls outside the rate plan validity.
For example, a rate plan is valid from October 5 till November 15. In this case, guests will be able to book a stay at the rate plan from October 3 to October 7, for example, even though October 3 and 4 fall outside the rate plan validity period.
3. Specify the period when the rate plan is not valid.

4. Select one of the following settings:
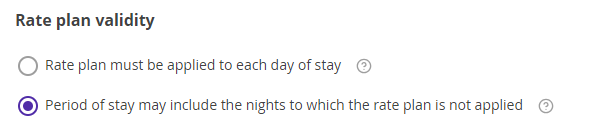
Rate plan must be applied to each day of stay.
For example, a guest booked a stay at a rate plan from November 5 till November 8. In this case, the rate plan will be applied to November 5, 6, 7 and 8.
Period of stay may include the nights to which the rate plan is not applied.
For example, a guest booked a stay at a rate plan from December 15 till December 20, and you specified in the rate plan settings that the rate plan is not valid for December 17 and 18. In this case, the rate plan will be applied only to December 15, 16, 19 and 20. For December 17 and 18, prices from the parent rate plan will be applied.
5. Tick the check-boxes for available check-in and check-out days on the rate plan.
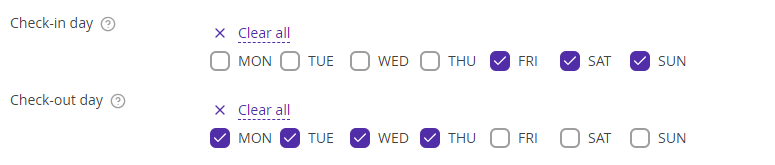
For example, you selected Friday, Saturday and Sunday as check-in days and Monday, Tuesday, Wednesday and Thursday as check-out days. If a guest books a stay from Thursday till Sunday, the rate plan will not be applied.
6. Specify the number of days before arrival:

Any number of days — the rate plan price will be applied to all nights of stay selected by the guest when booking.
Minimum — the rate plan price is applied when the guest books a stay of at least X number of nights. Specify this number of nights.
Maximum — the rate plan price will be applied to bookings for up to X number of nights. Specify this number of nights.
Equals — the rate plan price is applied for booking X nights of stay by the guest. Specify this number of nights.
Multiple of — the rate plan price will be applied for each X number of nights. Specify this value.
Within a period — the rate plan price will be applied to a booking for X to Y nights. Specify this number of nights.
7. If required, add another early check-in and late check-out rule for specific days of the week.
Select the required rules in the drop-down list and specify the days of the week to which it will be applied.
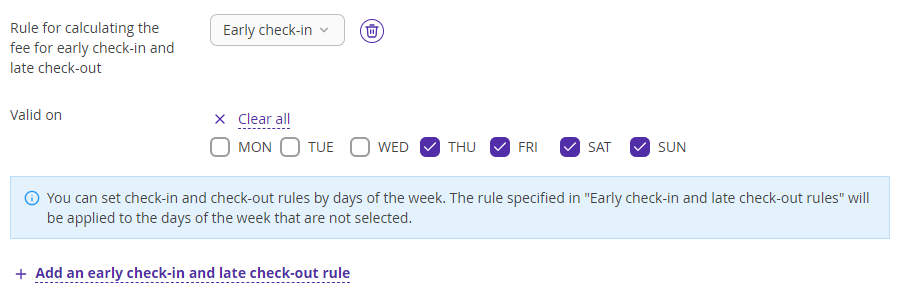
Note. You can set check-in and check-out rules by days of the week. The rule selected in the rate plan settings in “Main rules” > “Early check-in and late check-out rule” will be applied to the days of the week which you leave unchecked.
Prices
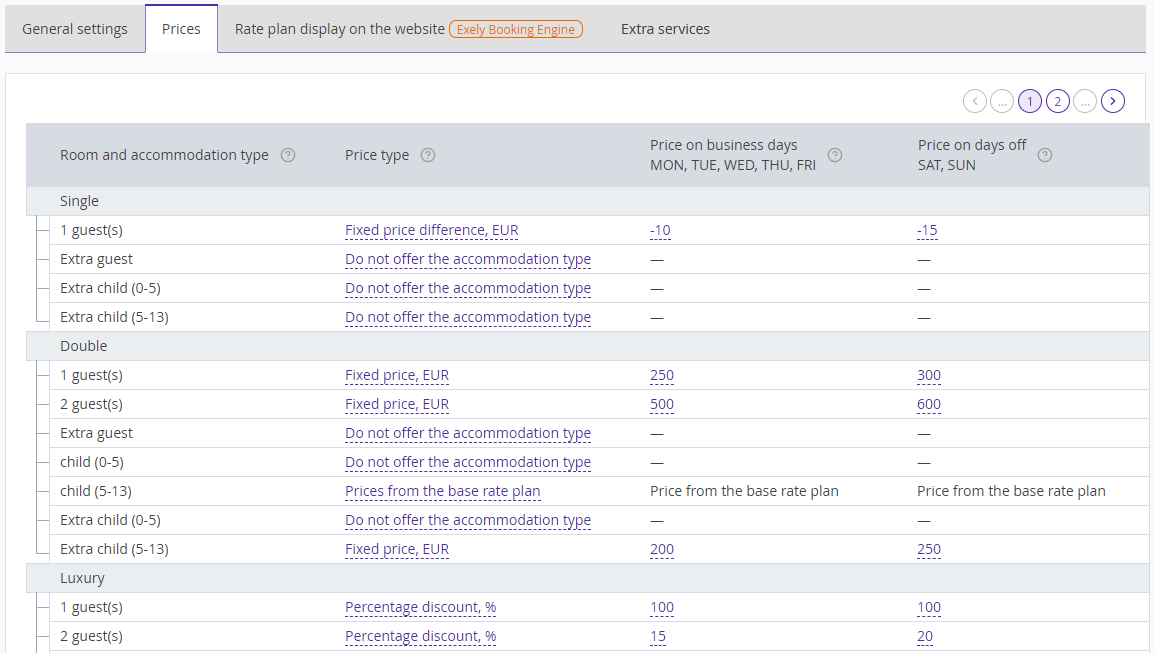
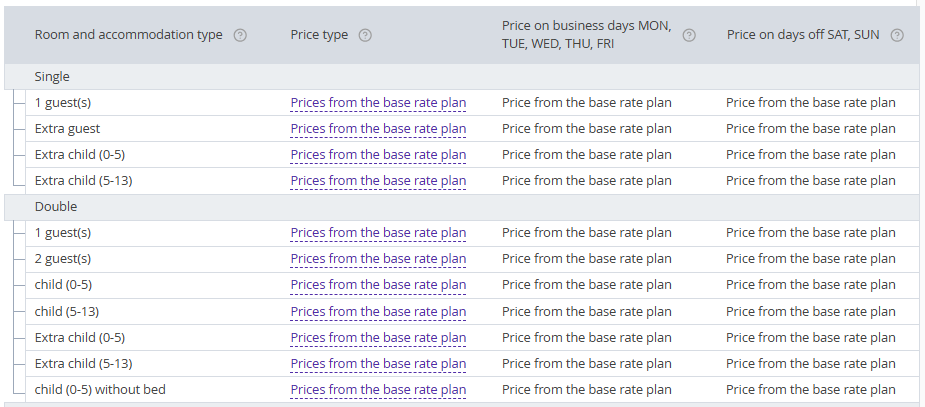
Switch to the “Prices” tab. All room types and accommodation types from the parent rate plan are displayed here.
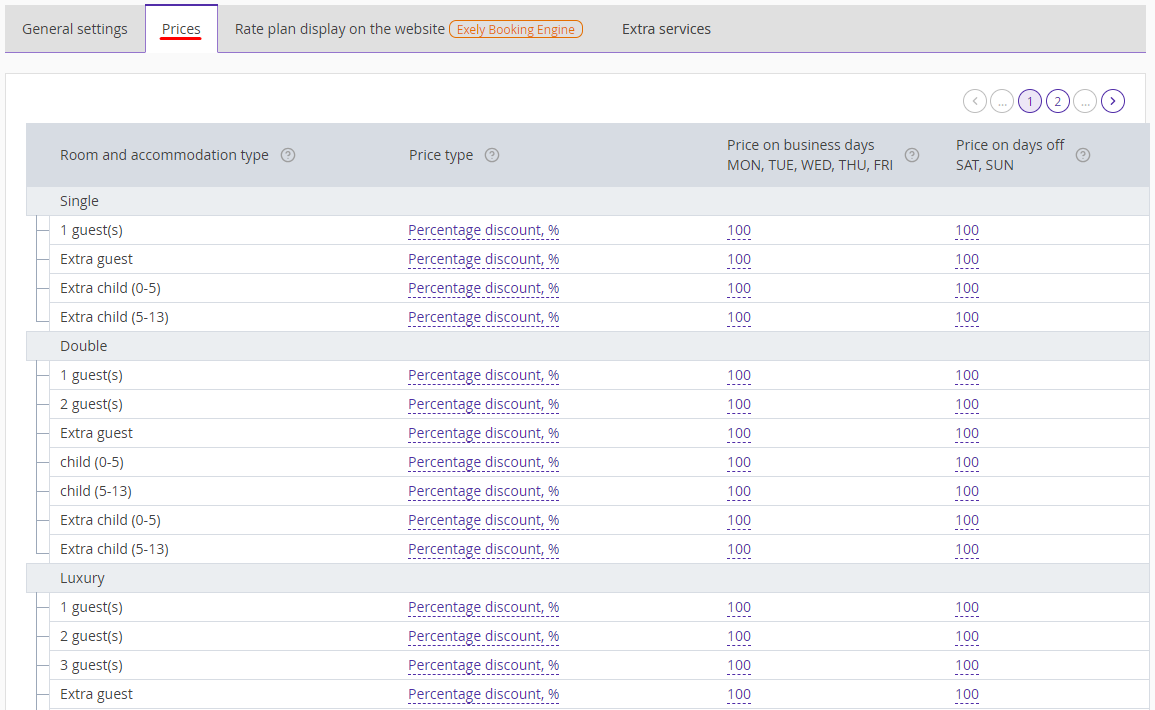
In the “Price type” column, click the link to specify the price type for the selected accommodation:
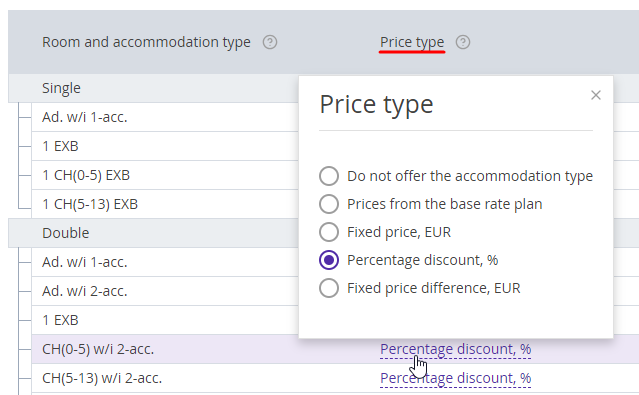
Do not offer the accommodation type — the rate plan will not be applied to the selected accommodation type.
Prices from the base rate plan — the parent rate plan price will be applied to the accommodation type.
Fixed price — a fixed price will be applied to the selected accommodation type. Specify the value for business days and days off.
Percentage discount — a discount will be applied to the selected accommodation type. Specify the discount percentage for business days and days off.
Fixed price difference — the price with the specified difference will be applied to the selected accommodation type. Specify the value for business days and days off.
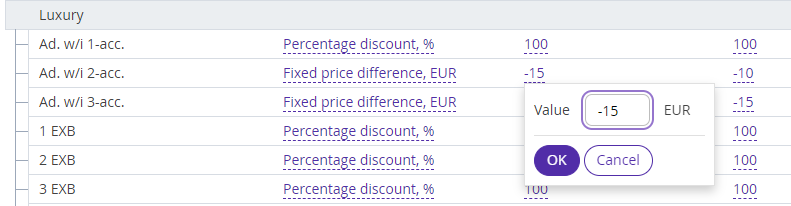
Below, you can see an example of a table with different types of price calculation:
Click the “Save” button at the top of the page.
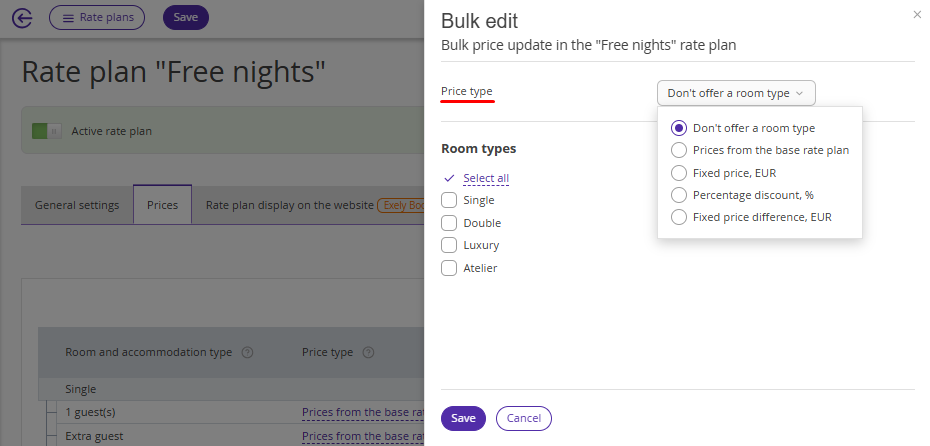
Bulk edit of prices
To reduce the time required to fill in the data and avoid errors, use the ‘’Bulk edit‘’ option.

Note. The “Bulk edit” option is available when prices are set in the parent rate plan for at least one room type.
In the opened window, select the price type.
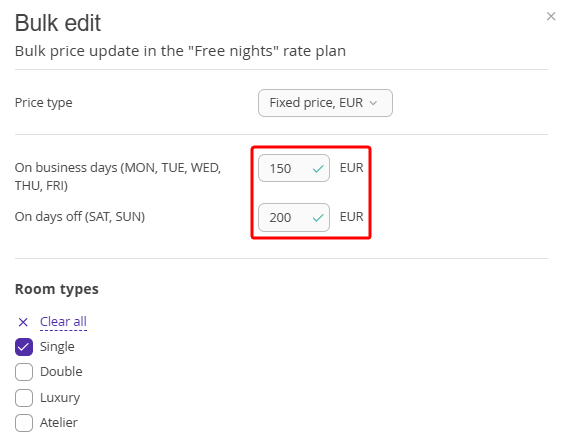
If you select the “Fixed price” type, set the prices on business days and days off.
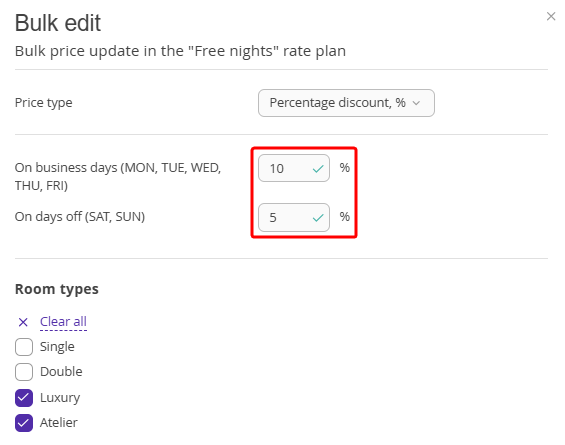
If you select the “Percentage discount” type, set the discount percent on business days and days off.
For the ‘Fixed price difference’ price type, set the value with a ‘-’ sign, if you want to decrease the price. If you need to increase the price, specify a number.
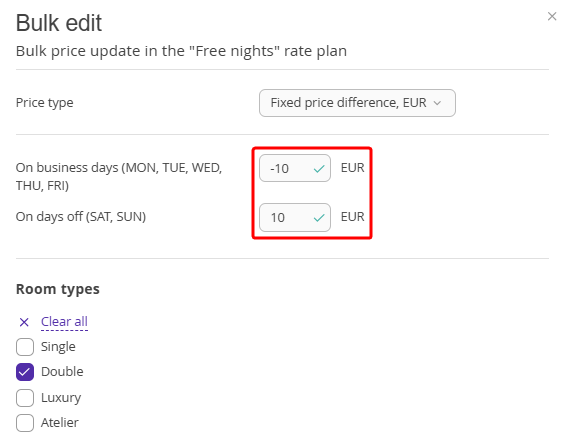
Tick the checkboxes for the room type to which the bulk edit will be applied. Click the ‘Save’ button.
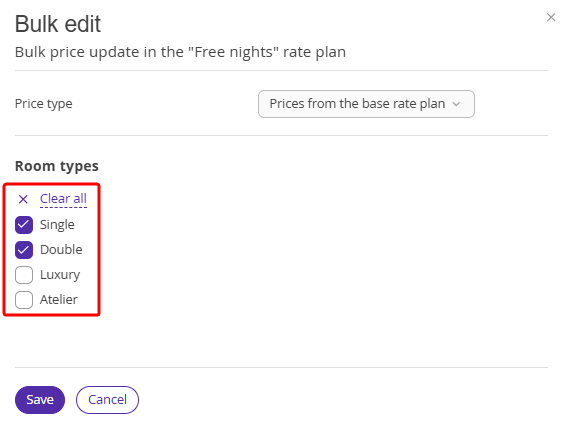
The changes will be applied to all accommodation types of the selected room types.
Rate plan display on the website
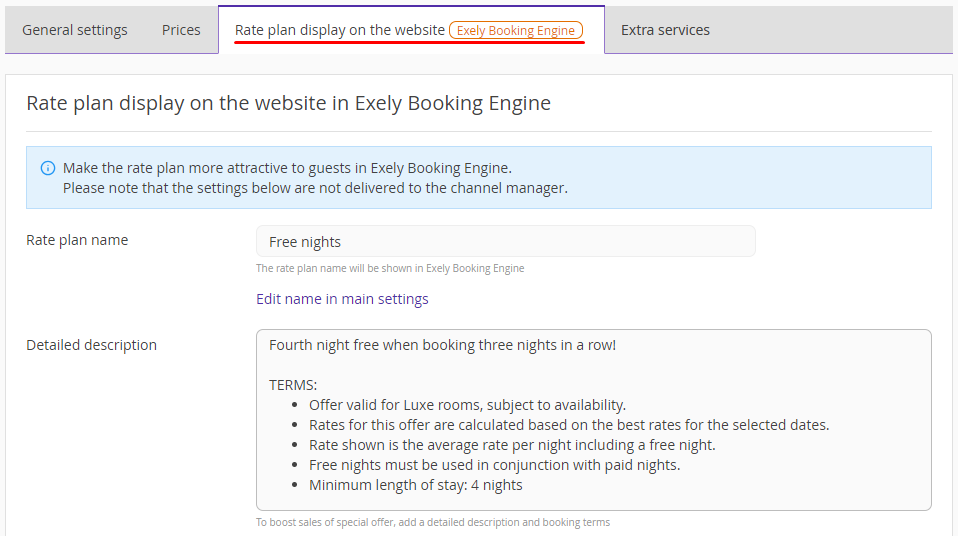
Switch to the “Rate plan display on the website” tab.
In the “Rate plan display on the website in Exely Booking Engine” section, the “Name” field is filled in automatically.
1. In the “Detailed description” field, enter the essential details and booking conditions of the rate plan to increase the sales.
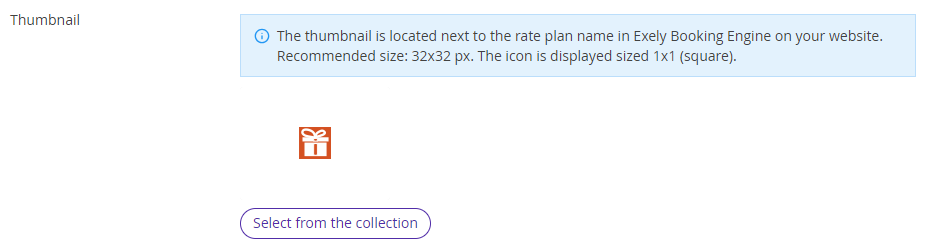
2. Add a thumbnail. It will be shown next to the rate plan name in Exely Booking Engine on your website.
You can select a thumbnail from the collection or upload your own image.
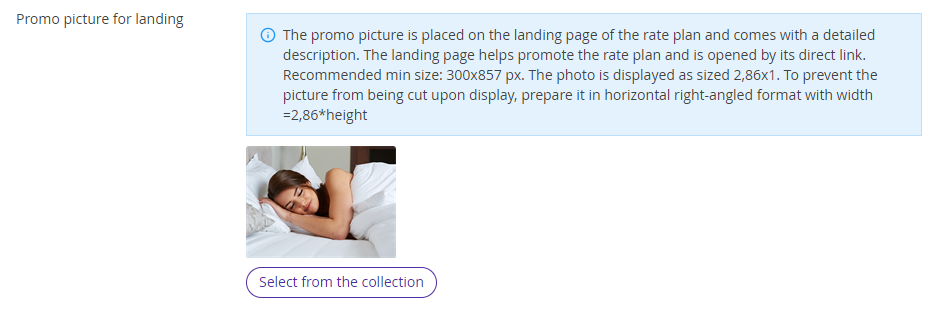
3. Select a promo image for the rate plan landing.The promo image is located on the rate plan landing along with a detailed description. The label promotes the rate plan for booking and opens with a direct link to the rate plan.
You can select a promo image from the collection or upload your own image.
4. In the “Discount motivator (price crossing)” section, tick the “Display price as a discount” check-box and select the rate plan for price comparison. The price with the discount will be shown in Exely Booking Engine.

5. In the “Promo codes” section, specify how guests can book at the rate plan:
No promo code,
With promo code.
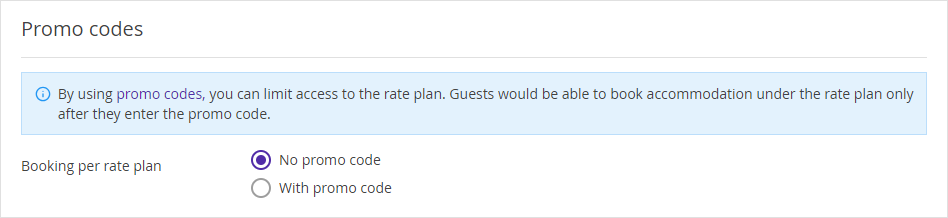
For details on promo codes, refer to the instruction “How to create a promo code rate plan”.
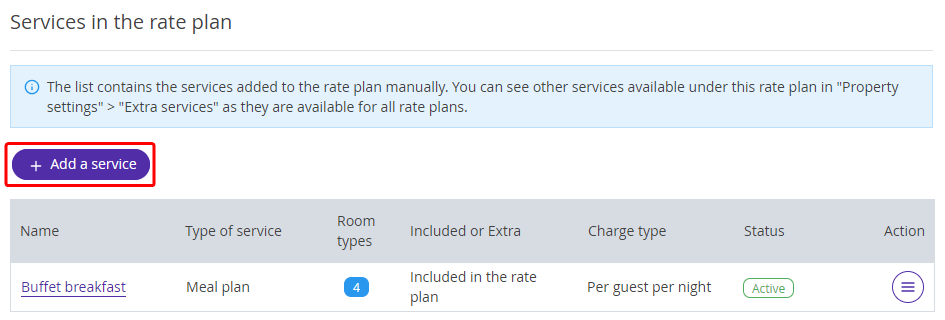
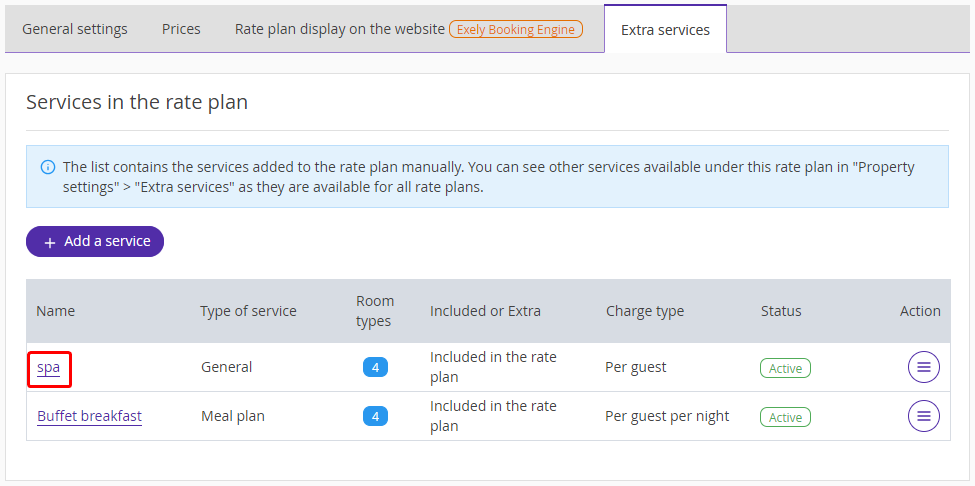
Extra services
On the “Extra services” tab, you can add extra services to the rate plan.
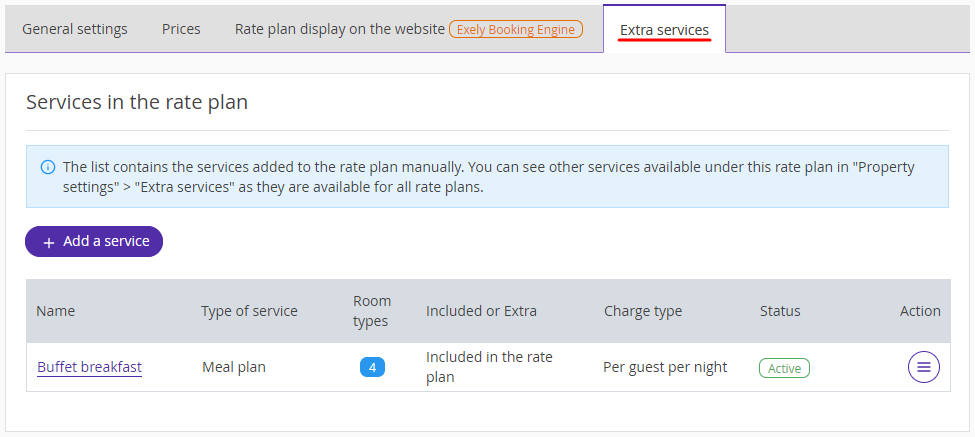
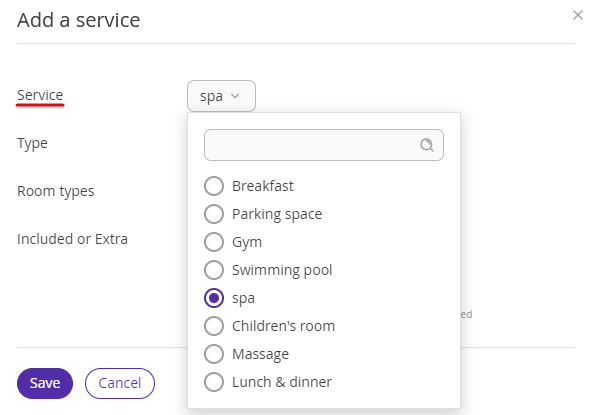
1. Click the “Add a service” button.
2. In the “Add a service” pop-up window, select the service from the drop-down list.
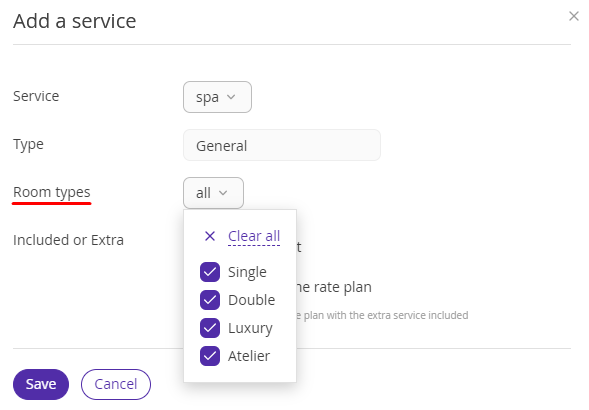
3. From the drop-down list, select the room types for which the service will be offered to guests.
4. Select whether the service will be:
For extra cost.
Included in the rate plan.
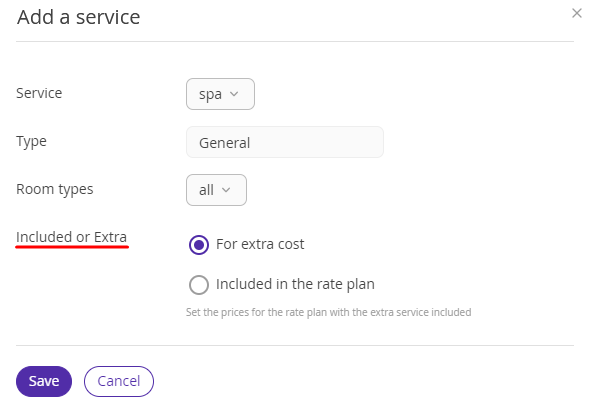
5. Click the “Save” button at the top of the page. The service will be added to the rate plan.
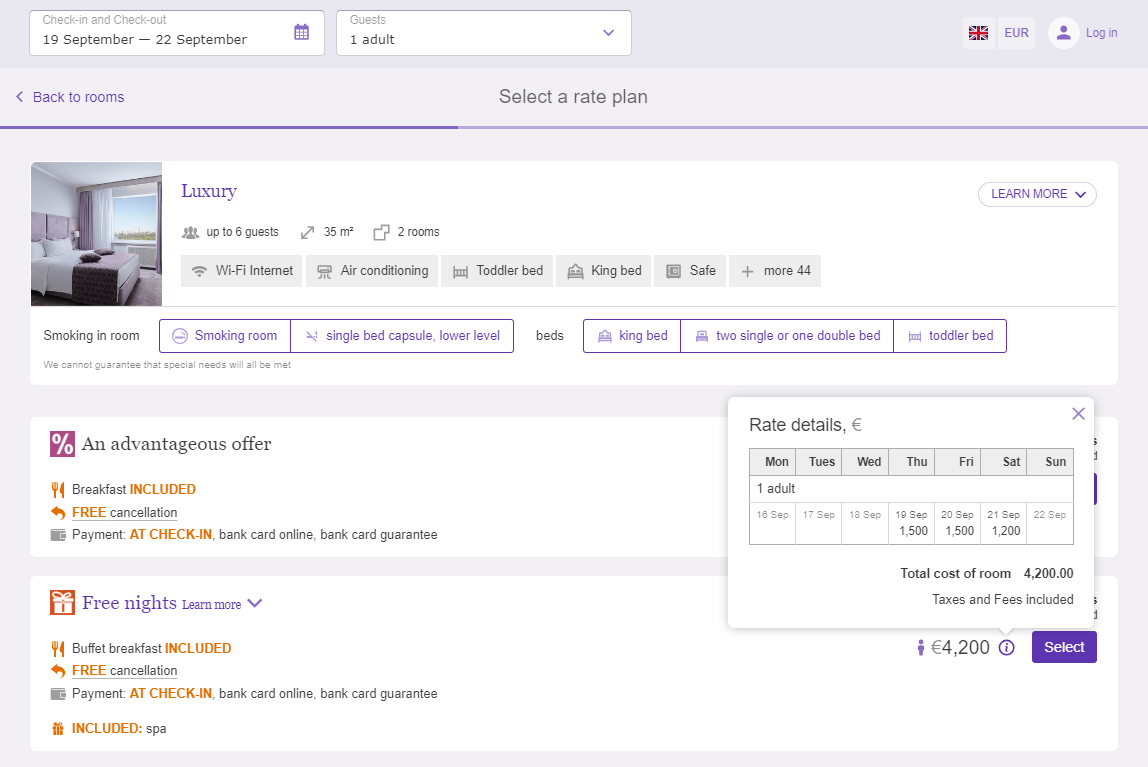
The “Free nights” rate plan display in Exely Booking Engine
This is how the “Free nights” promotion will look like at your website:
To learn more about the creation of promotions, see the instructions:
How to create “Black Friday” and “Cyber Monday”
How to create a derived rate plan