Import the bookings if you want to start working in Exely PMS quickly and see the statistics about the previous bookings.
The imported bookings are located in the “Without room” line by default. If you want them to get assigned to the room automatically, activate the setting for automatic assignment to any available room before you start importing.
NOTE. When importing personal data in bulk, you must ensure consent has been obtained for each entry. You may be asked to provide proof as the personal data controller, as outlined under "WHAT PERSONAL DATA DO WE COLLECT?" in our Extranet Privacy Policy.
What if the import was not done correctly
How to cancel all imported bookings
How to cancel some of the imported bookings
How to import bookings
1. Go to “Property management” → “Settings” and open the “Data import” tab.
2. Click “Import from file”. If you import bookings from Bnovo PMS, click “Import from PMS”.
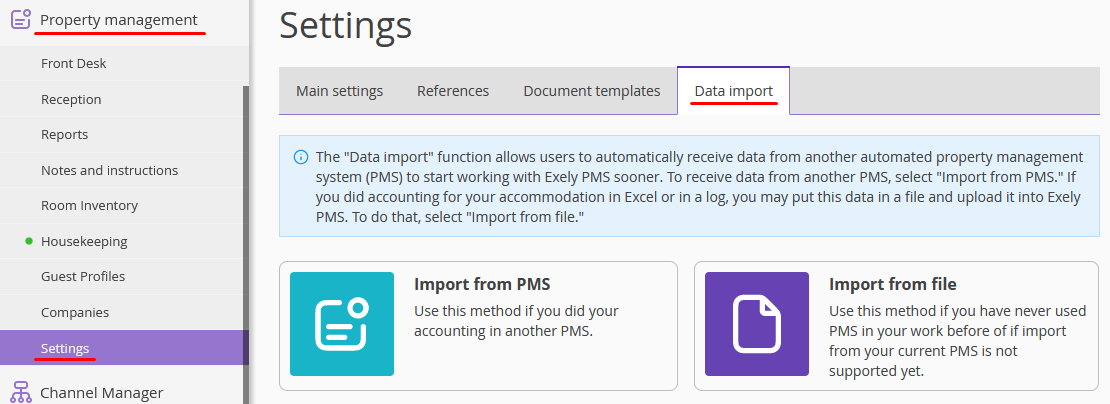
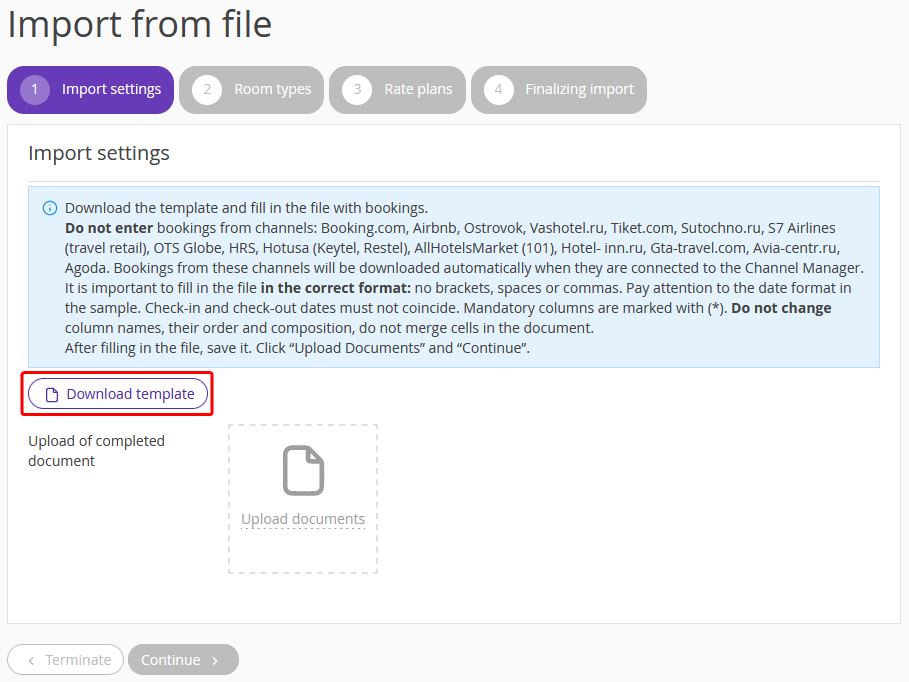
Read the tips in the blue background at every step while importing. It contains essential information you need to import bookings correctly.
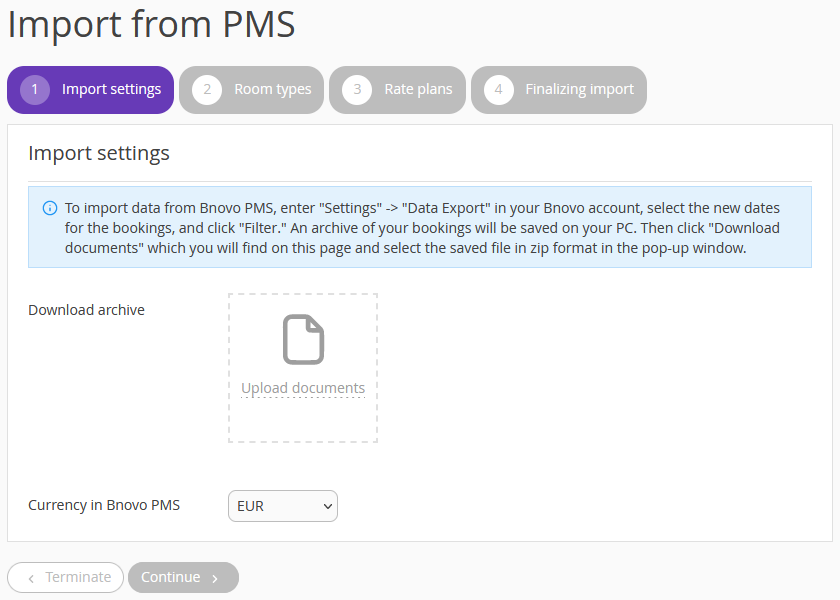
3. If you import bookings from Bnovo PMS, download an archive with the bookings from Bnovo PMS, upload it and click “Continue”.
If you import from an Excel file, click “Download template”. The Excel template will be saved on your computer.
Fill in the file with the bookings you need to import. Columns marked with “*” are mandatory. Do not change titles, order or composition of the columns.
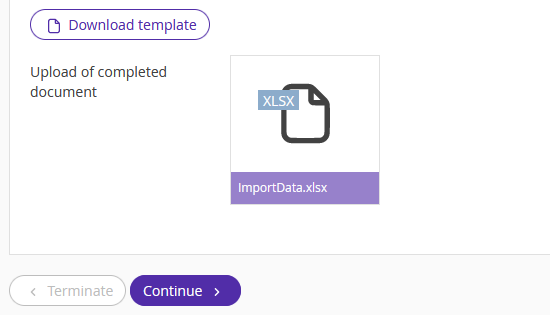
4. Return to the Exely extranet. Click “Upload documents” and choose the file with the bookings. Click “Continue”.
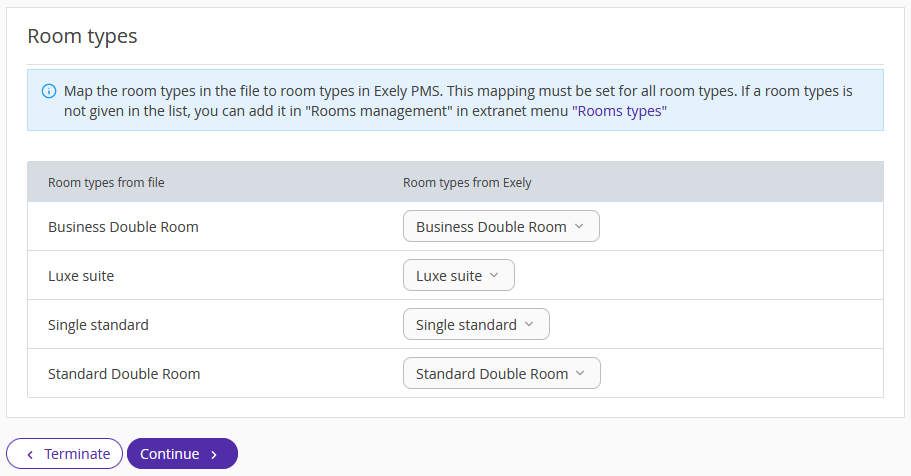
5. Map the room types from the file to the room types from Exely. It is an important step because the bookings should be imported in the corresponding room types. Click “Continue”.
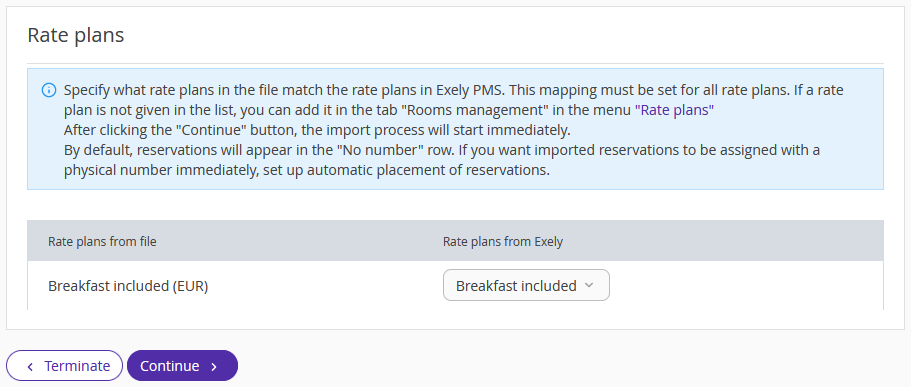
6. Map the rate plan from the file with the rates from Exely. Click “Continue”.
7. The process of import will start. While importing, you can go to other sections of the Exely Suite and continue your work.
8. When the import is completed, click “Done”.
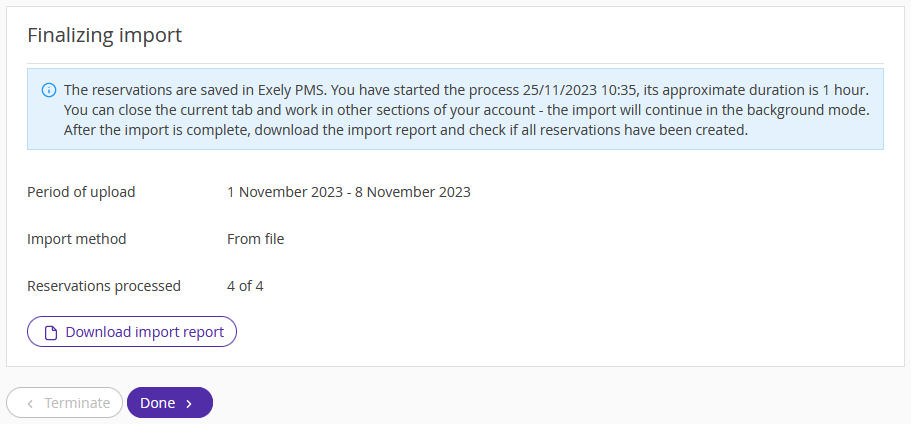
The bookings are imported. Download import report to make sure that all the bookings were processed correctly.
Import report
The report is generated after every import in the tab “Data import”.
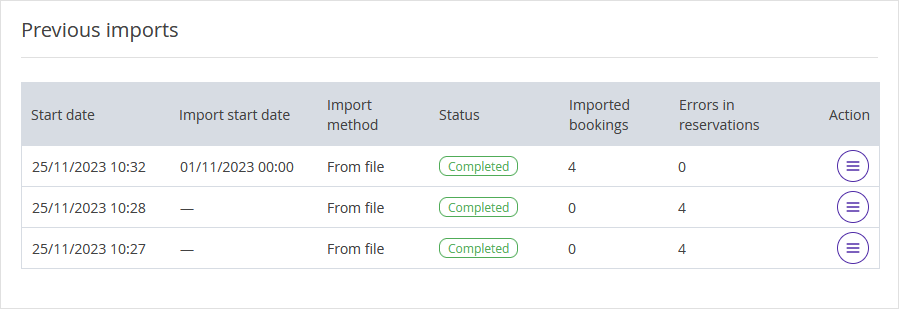
The report contains the following information:
1. Start date — a date when you uploaded the file and started the import.
2. Import start date — the earliest arrival date from the imported bookings.
3. Import method — the way how you import bookings.
4. Status:
Uploaded n% — shows the progress of the import and helps to see how much data has already been imported and how much data is to be imported.
Completed — the import has been successfully done.
Interrupted — the import was interrupted by the user.
Cancelled — all the imported bookings have been cancelled in Exely PMS.
5. Imported bookings — the bookings created in Exely PMS after the import.
6. Errors in reservations — the number of bookings that failed to import.
To open the import report:
1. Click the “Action” button and select “Download import report”.
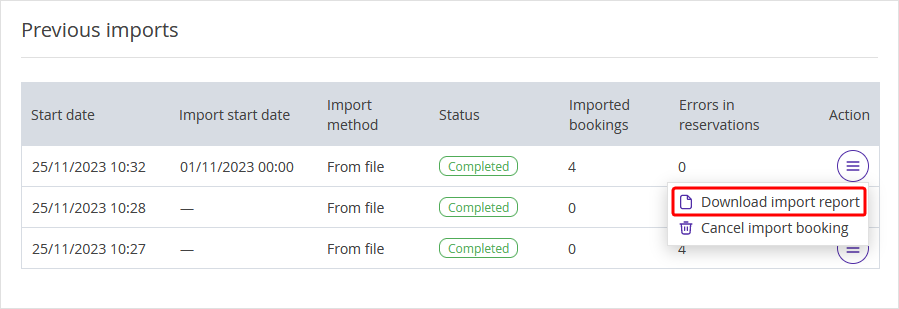
The Excel file with the report will be saved on your computer. The report contains 3 tabs:
Imported successfully — the bookings that have been successfully imported.
Imported with errors — the bookings that failed to save in Exely PMS, with the error description.
Invalid data — this tab shows the description of the errors. For example, some mandatory fields like Surname, Number of reservation, Cost, Check-in date, Check-out.
If some bookings failed to download successfully, fill in the template with these bookings, correct the mistakes and import the bookings again.
What if the import was not done correctly
Sometimes the import template is not incorrectly filled in, and it is necessary to cancel the import.
If the import is not yet complete, you can interrupt it.
1. Go to “Property management” > “Settings” and open the “Data import” tab.
2. In the “Previous import” section, click “Interrupt import” button on the right from the report.
3. Click “Apply” in the “Interrupt import” pop-up window.
The import status will get changed.
How to cancel all imported bookings
The next step is to cancel the bookings that have been saved in Exely PMS. You can cancel the bookings from the successful import the same way.
Click the “Action” button and select “Cancel import booking”.
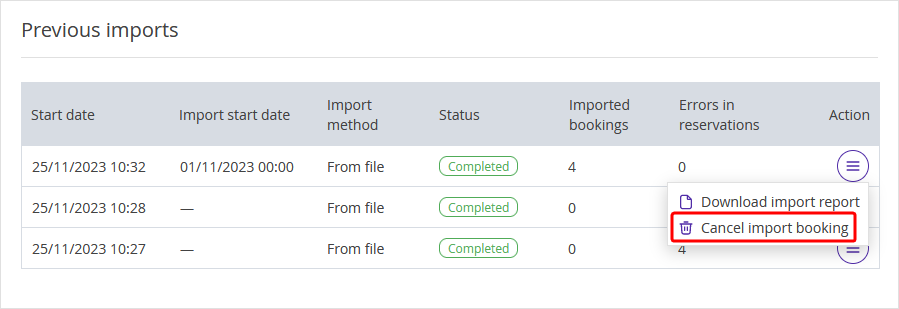
The bookings will be cancelled automatically. The notifications about the cancellation will not be sent to the guests.
How to cancel some of the imported bookings
You can cancel not only all the imported bookings but some of them.
1. Go to “Property management” > “Front Desk”, find the necessary booking and click on it.
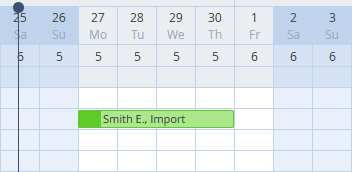
2. Click the “Cancel” button.
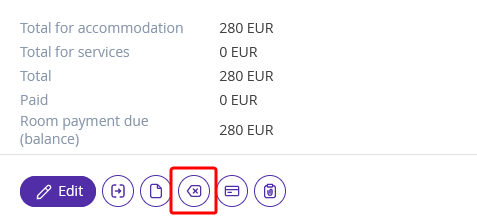
3. In the "Booking cancellation" pop-up window, select the reason for cancellation and click “Confirm”. The email notification will not be sent to the guest by default. If you need to send the notification, tick the “Send a notification” checkbox.