Step 2. Specify sender and subject
Step 4. Save and activate automated email
The “Non-guaranteed bookings” automated email is sent only to guests who booked a stay on the website and selected the "At check-in" payment method without making a prepayment.
Pay attention. The automated email is available if the Exely Payment Links solution is enabled in the Exely extranet. The payment link is generated automatically in Exely Payment Links.
In the Exely extranet, go to "Guest management" > "Guest relations" > "Emails", click "Create an automated email", and select “Non-guaranteed bookings”. The "General settings" tab will be opened. For more details on how to create an automated email, see the article "How to create automated emails in Exely Guest Relations".
Then follow these steps:
Step 1. Make general settings
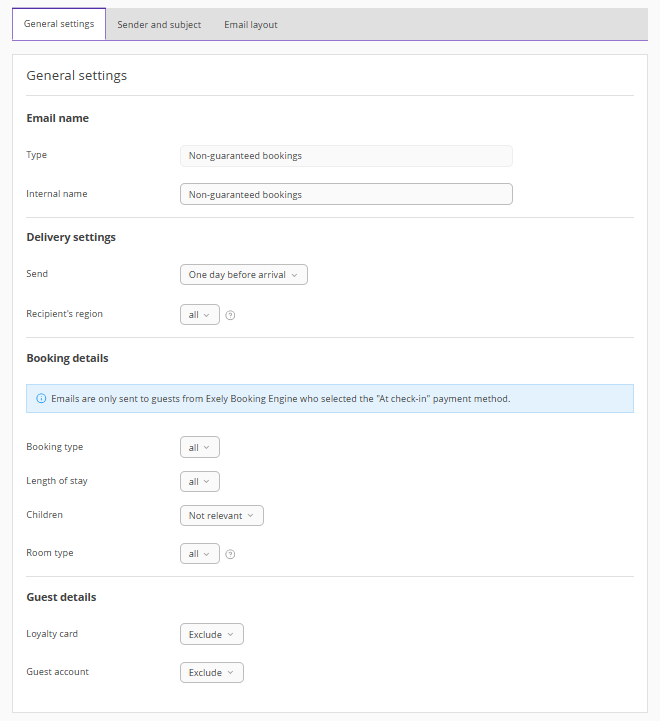
1. On the "General settings" tab, enter the internal name for the automated email. It is visible only to Exely extranet users. Statistics will be displayed based on the name and email type.
The automated email type is added automatically and cannot be edited.
2. Set delivery settings: when the email will be sent and recipient’s region. The regions specified in guest profiles in Exely PMS or a third-party PMS are taken into account.
3. Select the booking details that will be used to trigger automated emails:
Booking type — first-time or repeat. Only successful (not canceled) bookings are considered.
Length of stay — number of nights in the booking: one night or two or more.
Children — whether children are included in the booking.
Room type — room types available to guests when booking.
4. Specify guest details: whether the guest has an account and a loyalty card. The settings are available only if the loyalty program and guest account are enabled for the property.
Step 2. Specify sender and subject
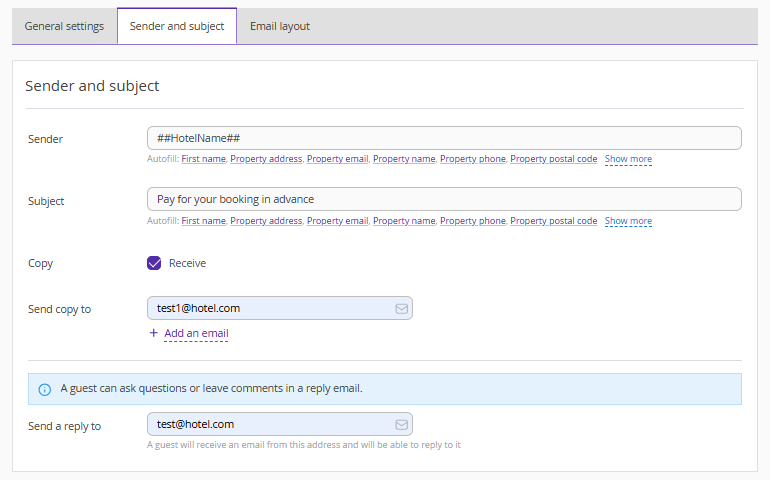
1. On the "Sender and subject" tab, specify the sender, for example, the property or department name. Use variables.
2. Enter the email subject. Use variables.
3. Tick the “Receive” check-box and specify an email address to send copies of emails to the property employees, if required.
4. Check or edit the reply-to email address.
Step 3. Set email layout
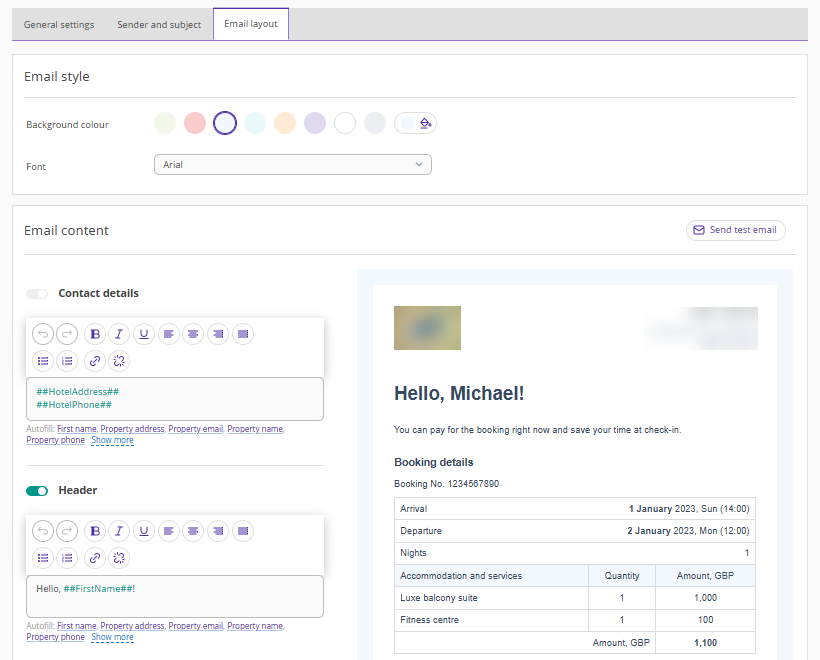
On the "Email layout" tab, make settings in the following sections:
Email style
1. Select a background color. To ensure you match your brand’s colour exactly, use HEX codes (hexadecimal colour codes).
2. Choose a font.
Email content
1. Fill in the main fields:
header;
body text;
signature.
Use variables if needed so booking data is automatically inserted into the email.
2. Set up the button to go to payment — enter the button text and select its colour in “Button styles”.
Pay attention:
The logo and contact details are added automatically from property settings and cannot be edited.
The "Contact details" field cannot be disabled.
Some fields can be disabled using a switch.
Booking details in the email match the information in the guest’s booking confirmation and cannot be edited.
The button contains a payment link, which is generated automatically in Exely Payment Links.
Attach files
Click “Upload files”. You can add up to 2 files, up to 2 MB each.
Test email
1. Click the “Send test email” button.
2. Enter an email address and click "Send".
HTML mode
If the standard email settings are not sufficient, you can use HTML mode (HTML stands for Hypertext Markup Language). In this mode, the template is displayed as code that you can edit to create a unique email style.
For more information on working in HTML mode, see the articles:
Pay attention. Changes made in HTML mode cannot be undone. If you edit the code and save it, you will no longer be able to return to the block editor in this automated email.
Step 4. Save and activate automated email
Save the changes and activate the automated email.
Set up language versions
For details on setting up language versions, refer to the article “How to create emails for international guests in Exely Guest Relations”.
How emails are sent
Emails in Exely Guest Relations are sent to the guest’s email address specified in the profile at the time set in the settings. Emails start being sent from the moment the automated email is activated.
If a booking was created after the scheduled sending time set in the automated email settings, the email will be sent immediately.
Example. Emails for the "Non-guaranteed bookings" automated email are sent 1 day before check-in. The planned check-in time is 14:00 on January 1. If the guest created a booking on December 28 — the email will be sent at 14:00 on December 31. If the guest created a booking on December 31 after 14:00 — the email will be sent immediately.