Resources are a key element of hourly services in the Exely extranet. They represent the actual bookable objects, such as locations, equipment, or staff members.
A properly configured resource allows Exely Suite to automatically control resource availability and capacity and ensure that online booking works correctly for your guests.
In the Exely extranet, you can create three types of resources in "Services" > "Resources": location, equipment, and employee.
|
Resource type |
What it is suitable for |
Examples |
Key parameter |
|
Location |
Spaces or areas with a fixed location |
Sauna, hammam, conference room, treatment room |
Capacity — the number of guests who can use the resource at the same time |
|
Equipment |
Inventory or items available for rent |
Bicycle, barbecue grill, SUP board |
Quantity — the total number of units available |
|
Staff profile |
Specific specialists whose time can be booked by guests |
Massage therapist, trainer, guide, instructor |
Availability and specialty |
How to create a "Location" resource
1. In the "Services" > "Resources" section, click "Create" > "Location".
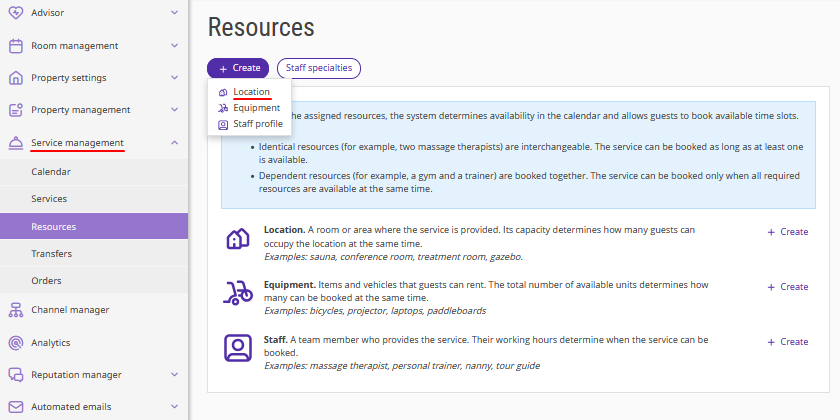
A resource creation window for an hourly service will be opened on the right.
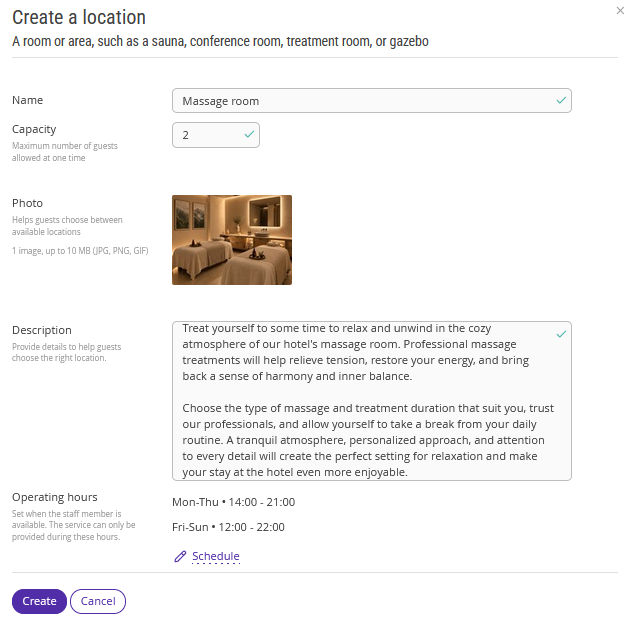
2. In the window, fill in the "Name" and "Description" fields.
3. Add one photo in JPG, PNG, or GIF format. The maximum photo size is 10 MB.
Note. Guests will see the name, description, and photo when booking the service only if the guest resource selection setting is enabled. This setting is available if two or more resources of the same type are linked to the service.
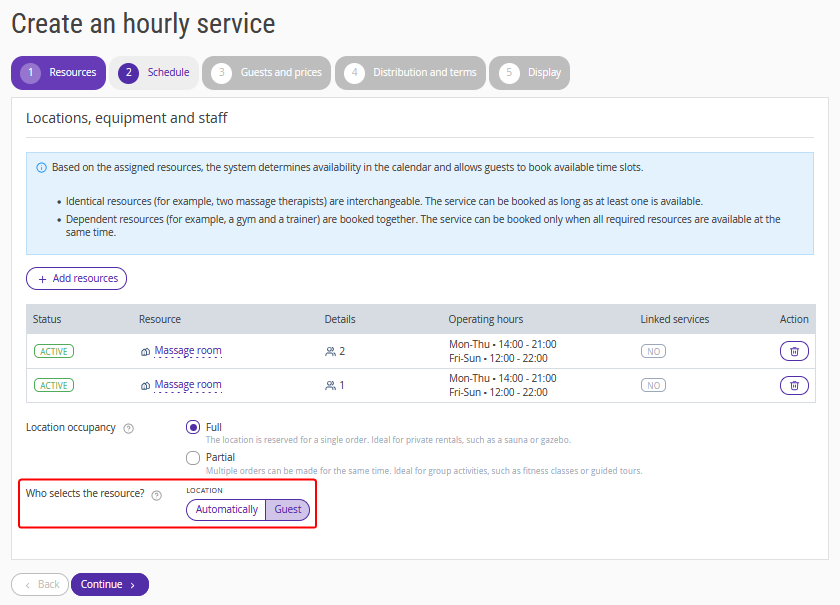
4. Specify the capacity — the number of guests who can use the resource at the same time.
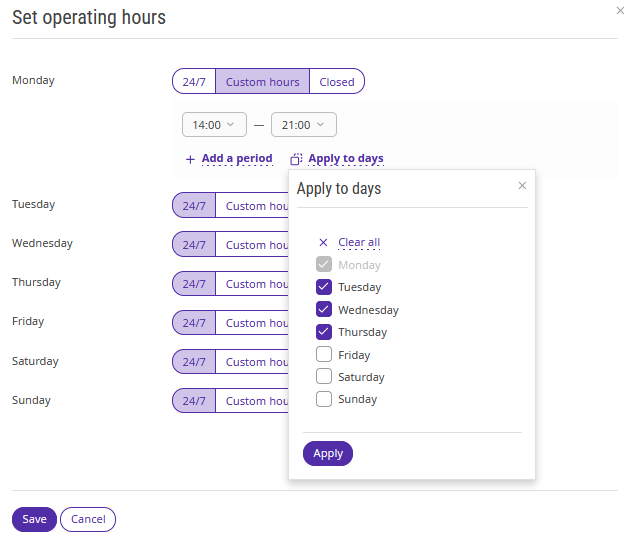
5. Set the time when the resource is available and unavailable for booking the service. By default, "24/7" is selected.
The "Apply to days" setting allows you to apply the same time interval and working hours to several days of the week at once. This simplifies the setup of an hourly service schedule when the settings are repeated.
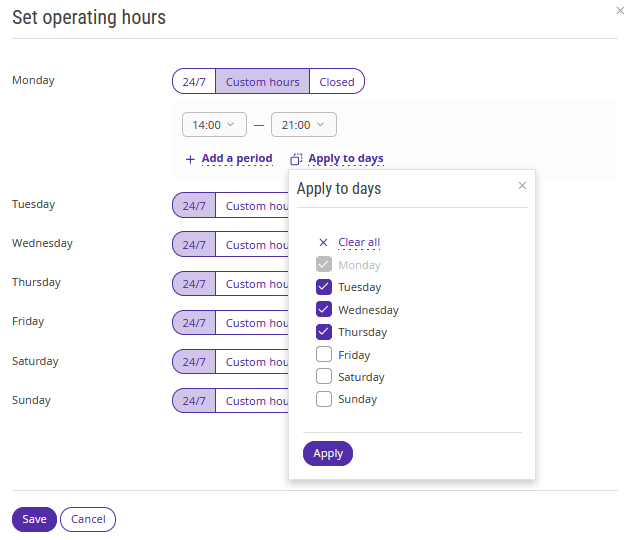
6. Click "Save". The availability schedule will be filled in. If necessary, you can edit it by clicking the "Schedule" link in the resource card.
7. Click "Create".
The new resource will appear in the list on the "Resources" page.
How to create an "Equipment" resource
1. In the "Services" > "Resources" section, click "Create" > "Equipment".
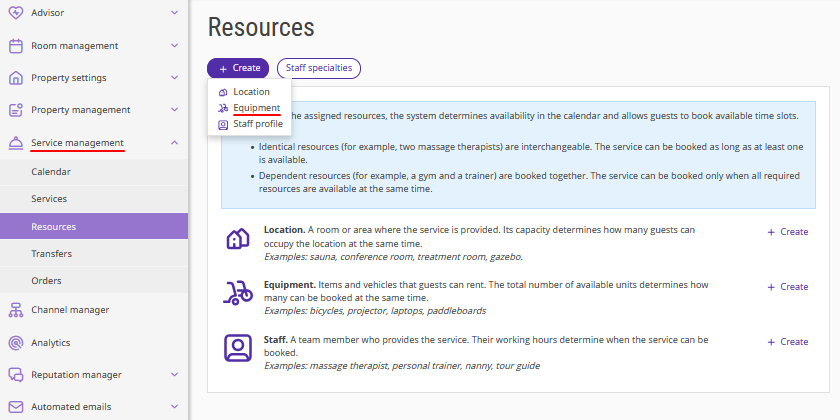
A resource creation window for an hourly service will be opened on the right.
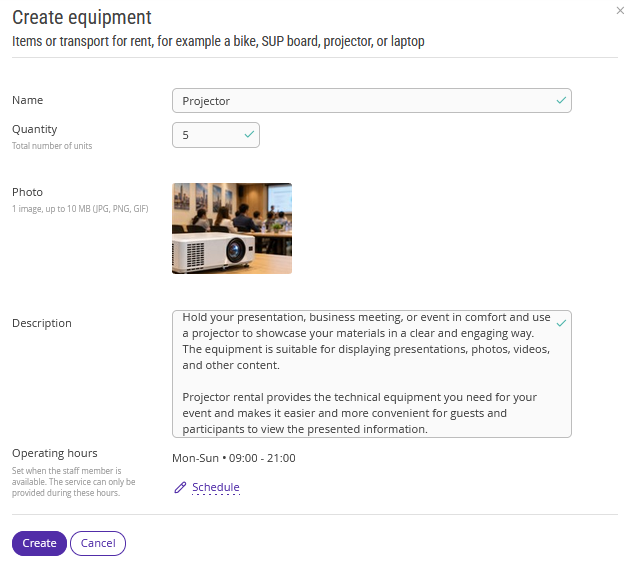
2. Fill in the "Name" and "Description" fields.
3. Add one photo in JPG, PNG, or GIF format. The maximum photo size is 10 MB.
Note. The "Name" and "Description" fields and the photo are for internal use only because the "Equipment" resource type does not have a guest resource selection setting.
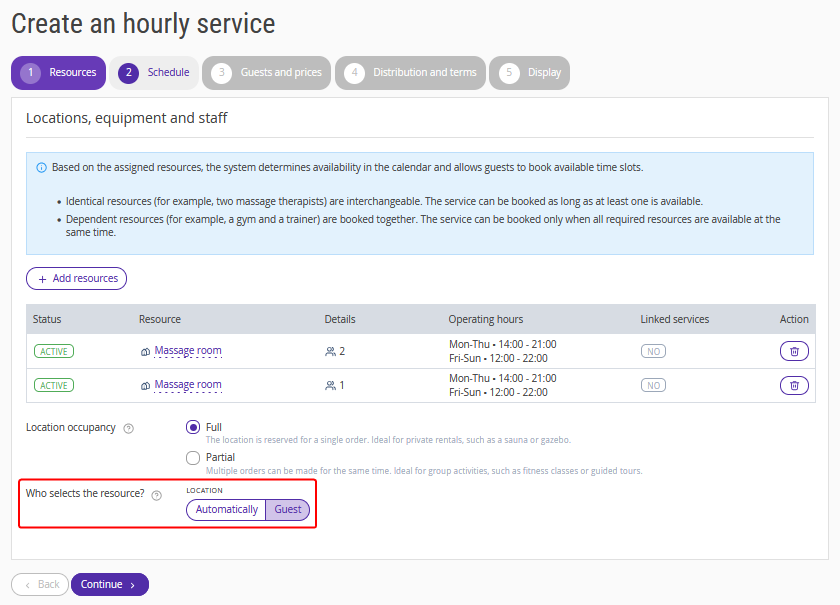
4. Specify the quantity — the number of inventory units available. Guests will see this quantity in the booking engine.
5. Set the time when the resource is available and unavailable for booking the service. By default, "24/7" is selected.
The "Apply to days" setting allows you to apply the same time interval and working hours to several days of the week at once. This simplifies the setup of an hourly service schedule when the settings are repeated.
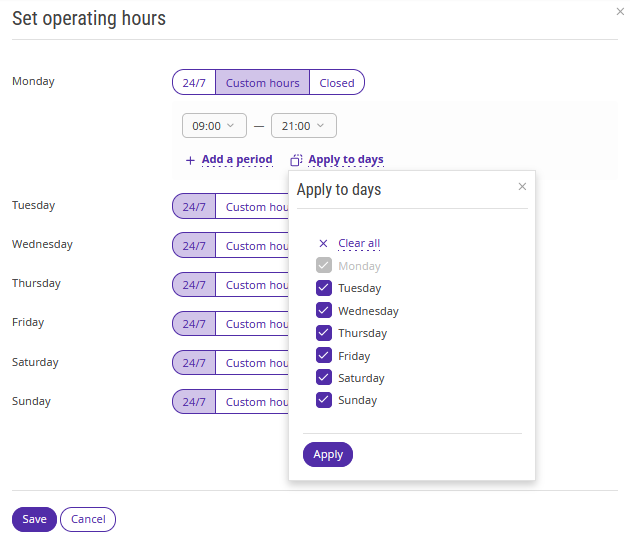
6. Click "Save". The availability schedule will be filled in. If necessary, you can edit it by clicking the "Schedule" link in the resource card.
7. Click "Create".
The new resource will appear in the list on the "Resources" page.
How to create a "Staff profile" resource
1. In the "Services" > "Resources" section, click "Create" > "Staff profile".
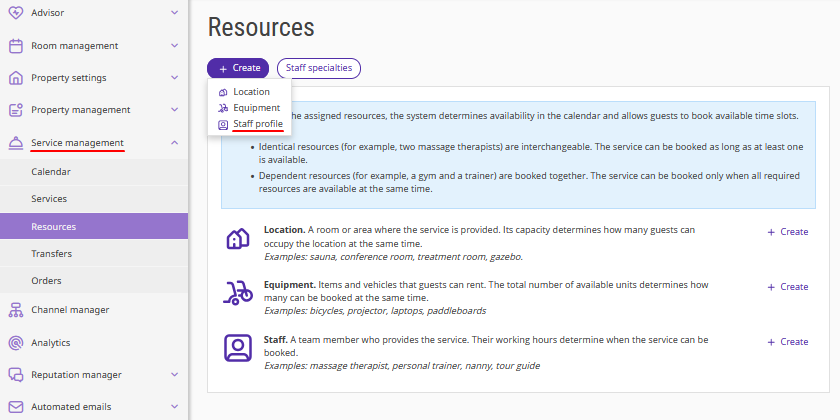
A window will be opened on the right where you can specify the employee's name, specialty, contact details, and working hours.
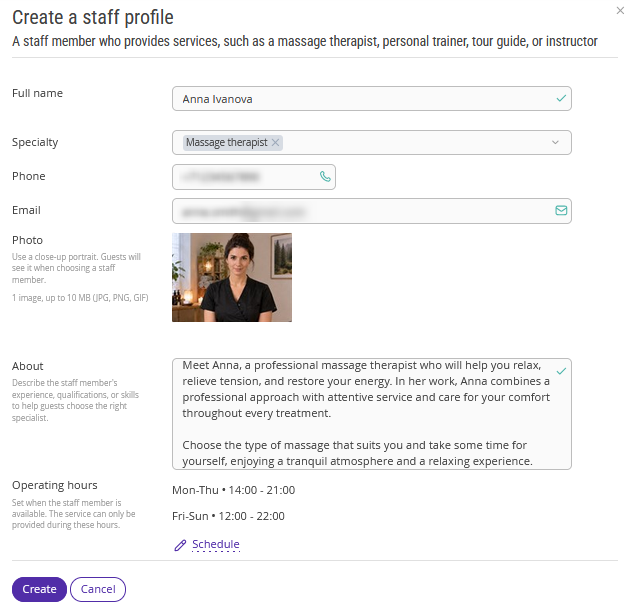
2. Fill in the fields:
Full name — guests will see these details when booking the service.
Phone and email — these details are for internal use only and are not visible to guests.
About — provide information about the specialist's education, experience, and skills.
3. Add a photo of the employee. It will be displayed when guests select the service in the booking engine. We recommend using a close-up portrait.
Note. Guests will see the specialist's full name, photo, and information about the specialist when booking the service only if the guest resource selection setting is enabled. This setting is available if two or more resources of the same type are linked to the service.
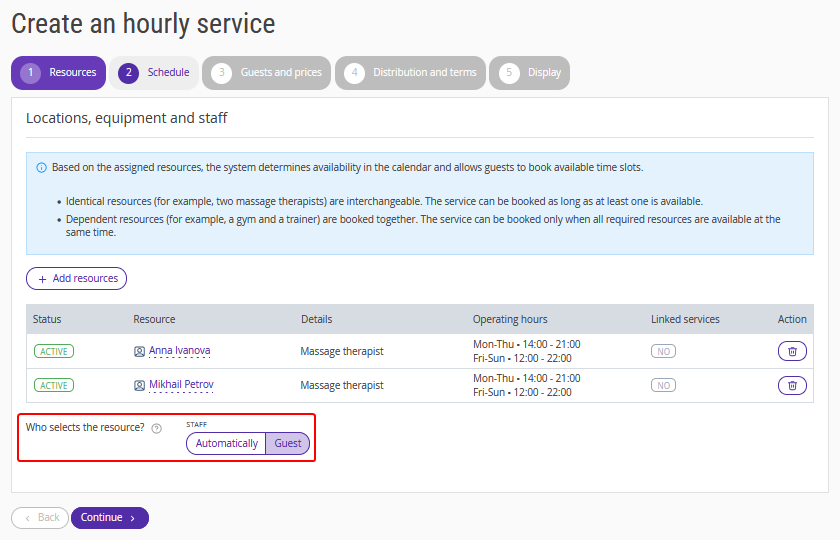
4. Select the employee's specialty from the drop-down list.
A specialty is the employee's professional role, such as massage therapist, cosmetologist, or yoga instructor.
If the required specialty is not in the list, create a new one on the "Resources" page by clicking "Staff specialties" > "Create".
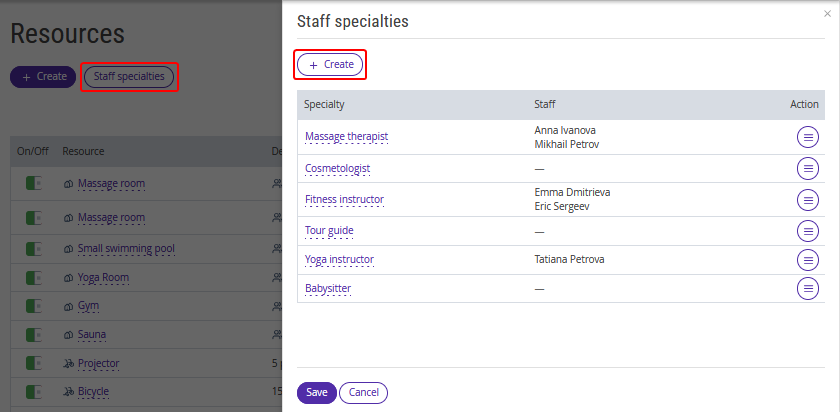
Pay attention. An employee must always have at least one specialty. If you want to delete the only specialty, first add a new one to replace it.
5. Set the time when the resource is available and unavailable for booking the service. By default, "24/7" is selected.
The "Apply to days" setting allows you to apply the same time interval and working hours to several days of the week at once. This simplifies the setup of an hourly service schedule when the settings are repeated.
6. Click "Save". The availability schedule will be filled in. If necessary, you can edit it by clicking the "Schedule" link in the resource card.
7. Click "Create".
The new resource will appear in the list on the "Resources" page.
Once the resources are created, you can start creating hourly services.
Actions with resources
Searching for a resource
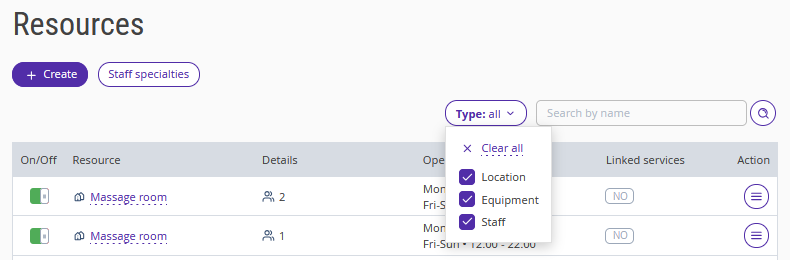
To find the required resource, you can filter the list of all resources by type.
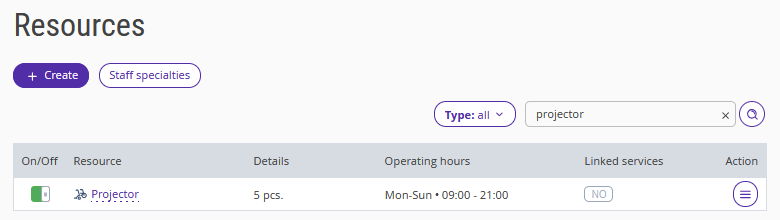
You can also fine a resource by name using the search field.
Activating and deactivating a resource
For guests to book a service with a resource, the resource must be active.
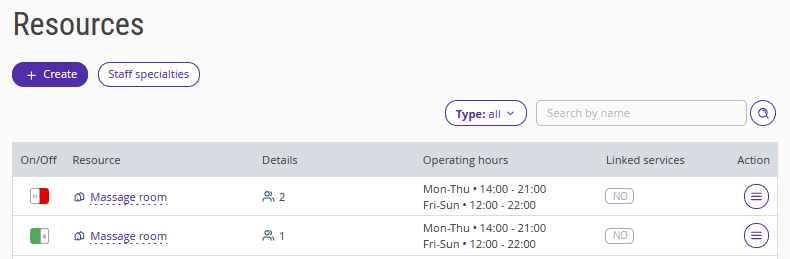
By default, a resource is activated when it is created. In the list of resources, the switch in the "Enabled" column is green.
To deactivate a resource, change the position of the switch and confirm the action.
Pay attention. Before deactivating a resource, check the services linked to it. If you deactivate the resource, guests will not be able to book the services, and you will not be able to create new services with this resource.
Editing a resource
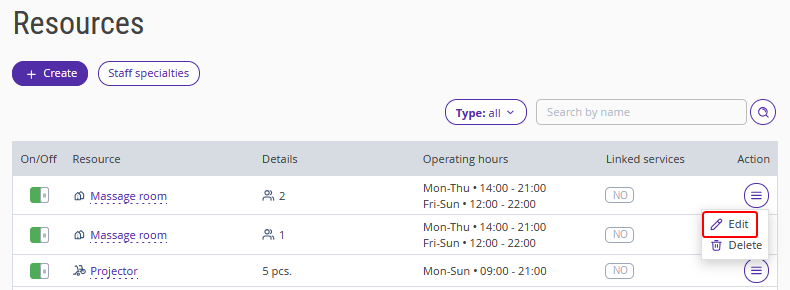
To edit a resource, click its name in the list of resources or click "Action" > "Edit".
Deleting a resource
To delete a resource, click "Action" > "Delete" in the list of resources.
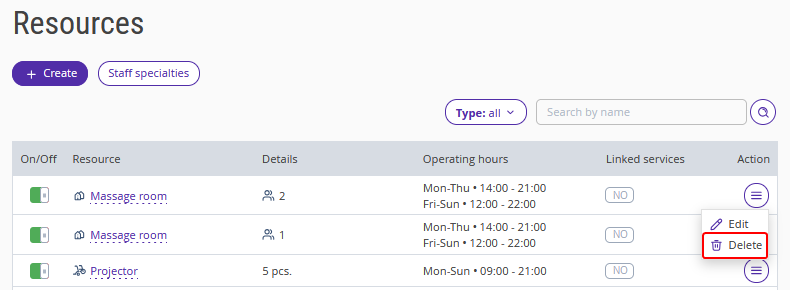
Pay attention. You cannot delete a resource if it is linked to a service. First remove the resource from the service, then delete the resource itself.
