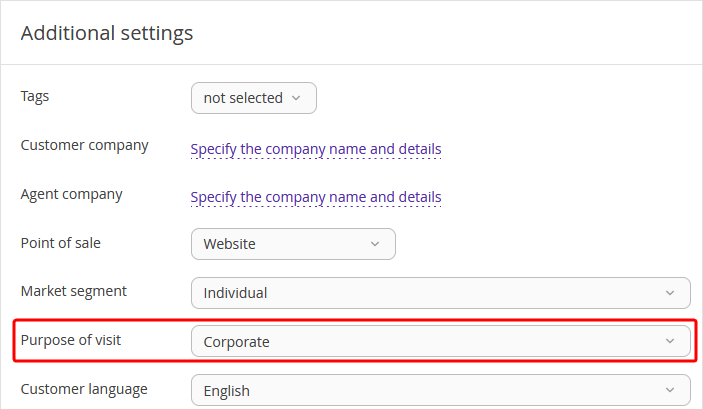
When making a booking in Exely PMS, you can indicate the guest’s purpose of visit. If the offered options are not enough, you can create new purposes of visit in the reference.
To create a purpose of visit, follow the steps below:
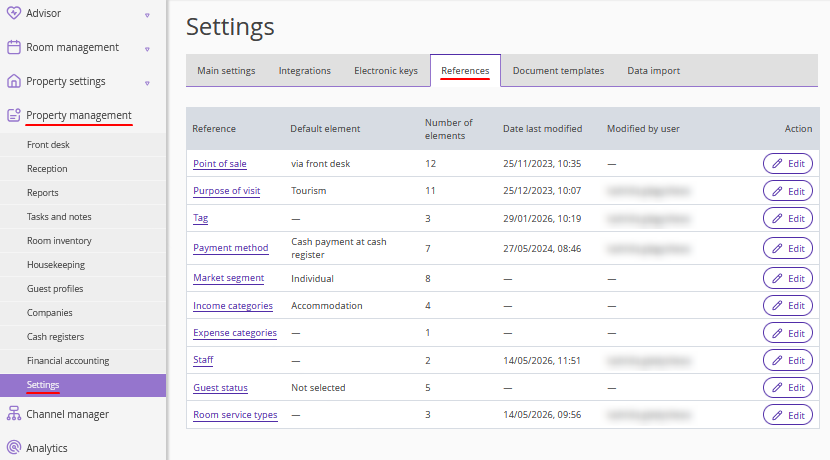
1. In the Exely extranet, go to “Property management” > “Settings” > the “References” tab.
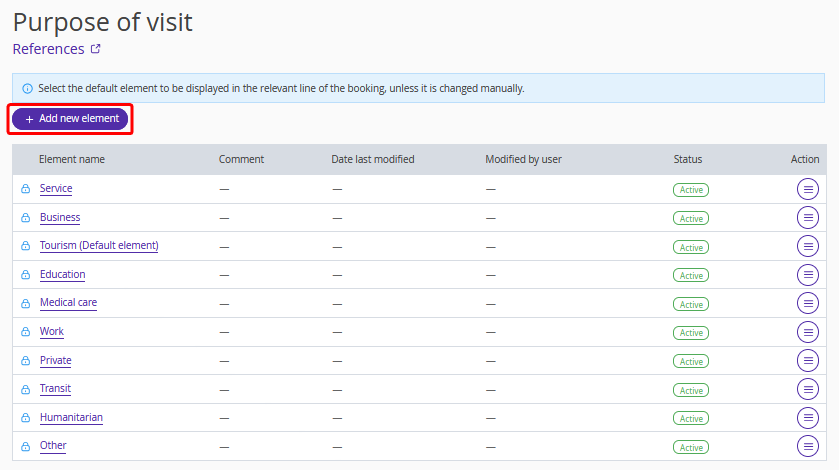
2. Open the “Purpose of visit” reference and click the “Add new element” button.
3. In the “Element name” field, write in a name for the new purpose of visit.
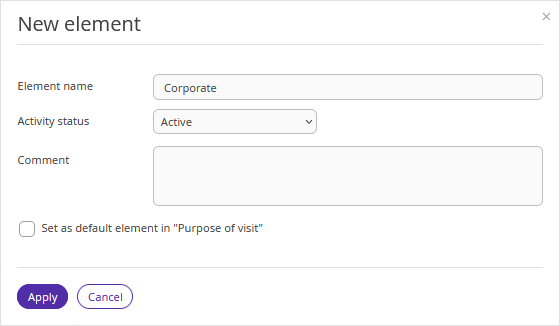
4. In the “Activity status” field, select the “Active” status to be able to indicate the new purpose of the visit right away after saving.
5. If you tick the "Set as default element in “Purpose of visit”" check-box, this purpose of visit will be automatically selected for all newly created bookings.
6. Click the “Apply” button.
7. Click the “Save” button at the top of the page.
Since now, you can select the newly created purpose of the visit when making or editing a booking.