The first step of setting dynamic pricing in Exely is creating rate levels and source rate plans: “Step 1. How to create price levels in dynamic rate plan”.
Then, proceed to creating the dynamic rate plan. If creating dynamic rate plans is not available to you, contact your Customer Support manager or Exely Customer Support team.
To create a dynamic rate plan:
1. In the Exely extranet, go to “Room management” > “Rate plans” and click the “Create base rate plan” button.

2. Enter the rate plan name and click “Dynamic rate plan”.
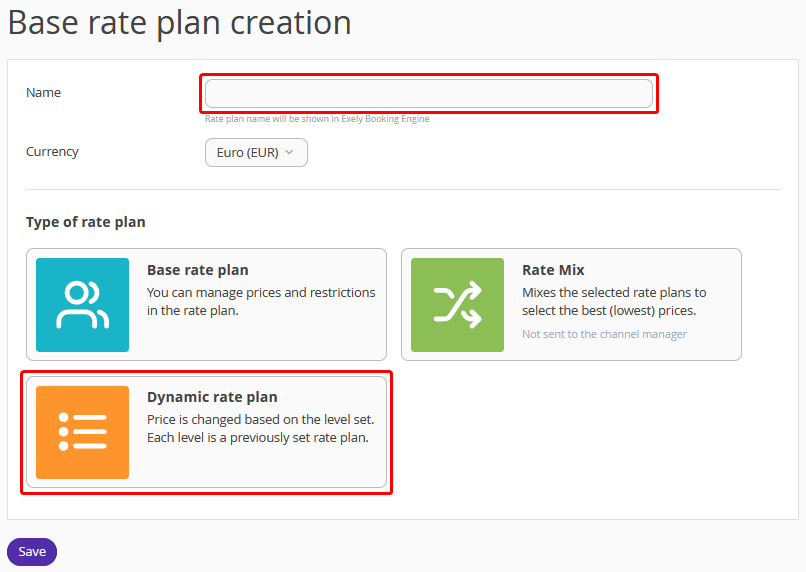
3. Specify if meal is included in the rate plan.

4. Click the “Save” button at the top or the bottom of the page.
The “General settings” tab
Switch to the “General settings” tab.
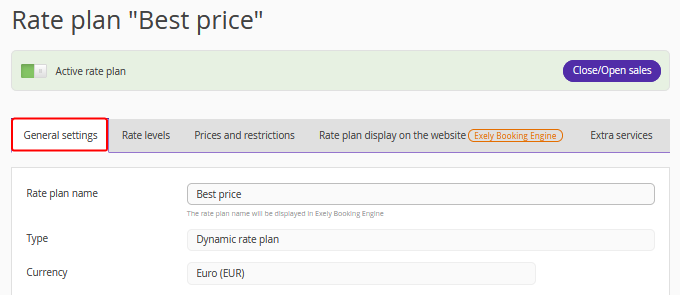
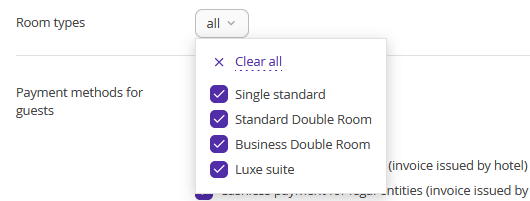
1. In the “Room types” setting, select which room types the rate plan applies to.
2. In the “Payment methods for guests” setting, select the payment methods that will be available for booking at this rate plan.

3. Tick the check-boxes for points of sale. Besides the “Official site” check-box, tick “Front desk booking” check-box for direct bookings at the desk created in Exely PMS and “Channel Manager” check-box, if you plan to offer the rate plan in the channels.

4. In the “Main rules” section, select the:
Cancellation rule. By default, “Main rule” is selected. For details on cancellation rules, refer to the instruction “How to set up a cancellation rule”.
Early check-in / late check-out rule. “Main rule” is selected by default. Details on early check-in / late check-out rules are available in “How to set an early check-in and late check-out rule”.
Availability block. “Main availability block” is selected by default. If you work with different availability blocks, select the required one from the drop-down list. Detailed instructions are available in the instruction “How to manage different availability blocks”.
Rounding rule. Select the required rounding rule from the drop-down list. For details, refer to “What is rounding rule”.
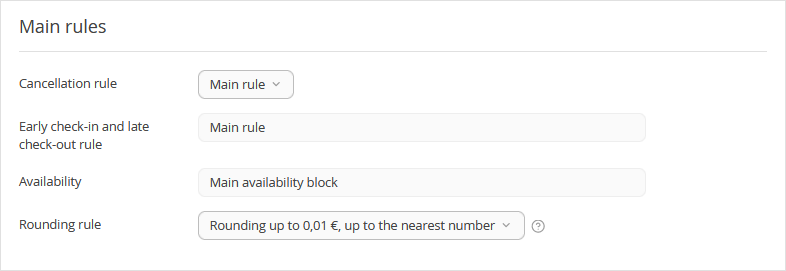
5. Click the “Save” button at the top of the page.
The “Rate levels” tab
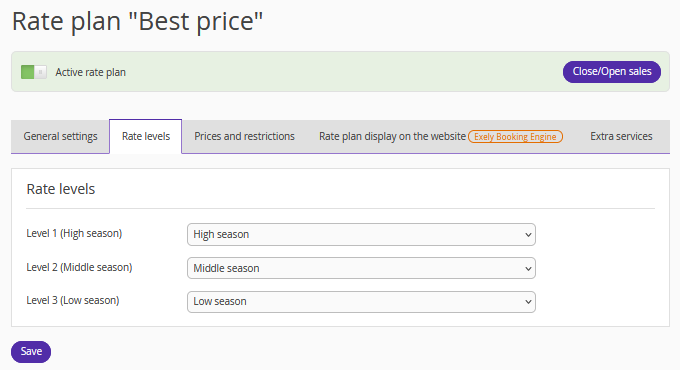
Switch to the “Rate levels” tab and set the rate levels mapping.
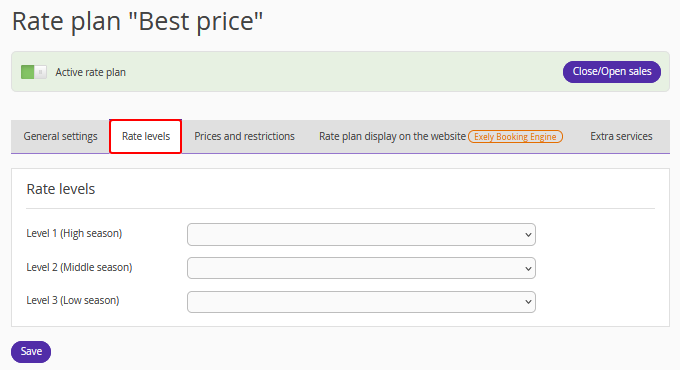
1. To do this, click on the first empty field and select a rate plan from the drop-down list to match the first price level.
2. Similarly fill in each level with the source rate plan. After filling all fields, click “Save”.
The “Prices and restrictions” tab
In the “Prices and restrictions” tab, the prices for each day will be displayed according to the set levels.
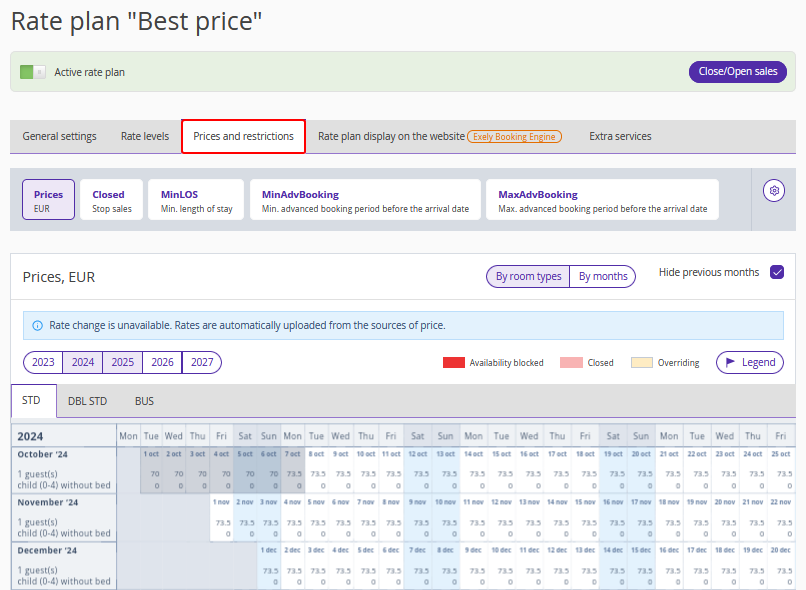
Note. It is not possible to change prices for dynamic rate plans manually. Instead, change them in the source rate plans or change the rate levels in the “Room management” > “Rate levels” section.If necessary, apply restrictions to the dynamic rate plan, for example, MinLos (Minimal Length of Stay), MinAdvBooking (Minimal advanced booking), Closed (Stop sale), etc. For detailed instructions, see the article “How to set up rate plan restrictions”.
The “Rate plan display on the website” tab
In the “Rate plan display on the website” tab, add rate plan description, add a thumbnail and a promo picture for landing to draw the attention of the website’s visitors to the rate plan in Exely Booking Engine.
The “Extra services” tab
In the “Extra services” tab, add additional services to the rate plan.
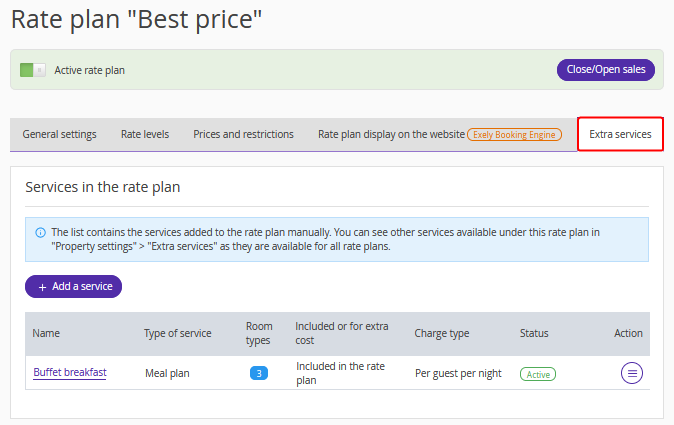
For instructions on how to create the services, read the article “How to create Extra Services».
Click "Save" at the top of the page to save the changes.
The next step is rate levels management: "Step 3. How to manage price levels in a dynamic rate plan".